Cook Perfectly Crispy Bacon In The Oven

453146655

Everyone loves bacon that is cooked to perfection; but, there’s no doubt, it can be a bit messy to cook and it certainly requires patience as you stand over the stove diligently turning and monitoring the progress of your bacon. Fortunately, there is an easy alternative to stove top cooking. You can cook perfectly crispy bacon right in your oven.

Simply preheat your oven to 400° F and place a rack in the lower section of the oven. Next, place bacon on a baking sheet. The bacon can be placed close together, but be sure that it doesn’t overlap. For easier cleanup, line the baking sheet with aluminum foil.

Bake for about 15 to 20 minutes, depending on the thickness of the bacon. Start checking after about 12 minutes. When the bacon is crispy and a nice golden brown, carefully remove from oven. If you notice bacon grease building up in the pan during the baking process, carefully pour the grease off. The bacon should not be submerged.

This method will produce a nice crispy bacon with a somewhat tender or chewy middle; however, if you want your bacon crisp all the way through, you can place a cooling rack inside your baking sheet and lie the bacon directly on the rack to bake. This method will allow the bacon to cook on all sides and will result in a crispier finished product.

When the bacon is done, carefully remove it from the baking sheet with tongs and drain on paper towels. Baking is a great way to make a large amount of bacon without having to cook several batches on the stove top. You can use the bacon immediately or cool it and use it for dishes throughout the week. Cooked bacon also freezes well and will take only a moment to warm up in the microwave.

Baking bacon is convenient and cleanup is easy. Just let the grease sit in the foil lined baking sheet until it cools and solidifies, then, gather the foil with the grease and throw it in the trash.

Follow us for more great articles from the most delicious blog on the internet.

How You Can Make Fresh Berries Last Longer

462313179

Berries are tasty garden fruits that have unique nutritional values. However, berries must be selected and stored with tender care to maximize their benefits. If you intend to supercharge your diet or enhance your overall health, eating berries is one of the best nutritional bargains around. Before buying them, you should carefully check for mold and broken berries since they usually spoil quickly if they are broken or kept in damp conditions. Good berries that are sold in a supermarket or farmer’s market should not be moist, soft, or pale colored. They should also be kept in clean and dry cartons which indicate that the fruits inside are not moldy. Below are various strategies to make fresh berries last longer:

Do not wash your berries unless you are ready to consume them because the moisture from the water will surely encourage mold. To store them, simply wash these fruits with a water and vinegar solution. By following this washing method, your berries will stay fresh for days and sometimes even weeks. Prepare a diluted vinegar bath in a large bowl with one cup of vinegar and three cups of water. Washing your berries in this solution destroys bacteria and pesky mold.

To get rid of the vinegar taste, remove the moisture from the berries by letting it flow out in a colander and wash them with running water afterwards. In order to make sure that there will be no traces of moisture left on your berries, you can use a salad spinner for thorough drying. Line the salad spinner with three layers of paper towels before placing your berries inside. Let them spin for 15 seconds or until you cannot see any moisture remaining.

Another option to make fresh berries last longer is by dunking them in hot water. Keep them for under water for approximately 30 seconds with a temperature between 120-140°F. Do not let your berries spoil by allowing them to get moldy overnight. Follow these simple steps to keep your berries fresh and enjoy these fruity pleasures.

Discover more great articles from the most delicious blog on the Internet by following us at Italian Home Kitchen Blog.

How To Make Cold Brewed Coffee

470657058

There’s nothing like a refreshing drink on a hot summer day. For many, that means something with caffeine, making cold coffee drinks all the rage. While some  may think that iced coffee and cold brewed coffee are the same, they are not. Ice coffee is brewed traditionally at high temperatures then cooled and poured over ice. Cold brewed coffee, on the other hand, is just what it sounds, producing a different taste that aficionados prefer.

Cold brewed coffee has several advantages over its iced cousin, beginning with lower acidity levels. Because the grounds aren’t subject to intense heat, the brew’s chemical profile is different. You’ll enjoy a smoother, more mellow cup that tastes naturally sweeter. Neither will you deal with a watery brew. Iced coffee is essentially diluted because it mixes with melting ice. If you like your beverages with high amounts of caffeine, cold brew is for you. Cold brews have a higher bean-to-water ratio and a longer brew time, making it more caffeine intensive.

Cold brew is an expensive drink in boutique coffee shops. Fortunately, you can make it easily at home in three steps.  Almost any type of large container works, including a Mason jar or if you are going the more traditional route, a French press. Cold brew is also one of the easiest coffee methods available.

Start by grinding 3/4 cup of beans for 4 cups of cold water. Taste is subjective, however, so adjust accordingly. This amount can be doubled or tripled depending on how the size of the container. Make sure the grind is coarse as finer grinds will result in cloudy coffee.

Put the coffee in a container that is deep enough to hold the coffee and water and light enough to be picked up for straining. If using a French press, pour the coffee into the bottom of the canister. For both, gradually add water and stir gently, making sure all the coffee grounds are moistened. Let stand at room temperature for at least 12 hours for proper extraction.

Once steeping has finished, take cheese cloth and line a fine mesh sieve set over a large pitcher or bowl. Pour the coffee through the sieve and wait until the coffee filters out before discarding the cheesecloth. If using a French press simply press down to move grounds to the bottom and pour.

Follow us for more great recipes for drinks and foods at the most delicious blog on the Internet.

Easy Gazpacho Salad Recipe

178156040

Delicious marinated vegetables are the star in our easy gazpacho salad recipe; comprised of fresh cucumbers, tomatoes and red onions. This is just about the easiest recipe in our collection and can be made quickly. Just like our Cannellini Relish recipe, the trick to this recipe is just to let the vegetables marinated for 8-12 hours to let the vegetables soak up all that delicious vinaigrette. This recipe is so quick and simple that we used to make it in a fix at the restaurant, or substitute this salad for others if we ran out of ingredients.

How to Make Gazpacho Salad

Ingredients:

  • 3 Medium Roma Tomatoes
  • 1 Medium to Large Red Onion
  • 1 Cucumber
  • 1/2 Cup of Olive Oil
  • 1/3 Cup of Red Wine Vinegar
  • 1 Tablespoon of Chopped Garlic
  • 2 Teaspoons of Worcestershire Sauce
  • Salt and Pepper To Taste

Preparing Your Vegetables

475852043

Wedge Tomatoes

Preparing the tomatoes is easy, even if your knife skills are a bit lacking. Create tomato wedges by simply cutting the top of the tomato with the stem off, then splitting the tomato down the middle, lengthwise. Next, lay the tomato halves flat with the cut side down. Cut each half in-half again lengthwise. Now take each quarter and split in half again — leaving 8 perfect tomato wedges.

56569387

Sliced Cucumbers

Now, slice your cucumbers by removing both tip ends. Then, simply slice the cucumber into thin, round medallions. Try to get the slices as thin as possible, otherwise the cucumber flavor tends to be a bit too strong in each bite and can actually overpower the tomatoes, onions and vinaigrette. For perfectly thin medallions every time, feel free to use a mandolin slicer.

485355854

Sliced Red Onions

When it comes to slicing your red onions, you have two choices. you can slice the onions into rings, or you can slice into strands. For rounds, simply cut the top and bottoms off of the red onion and slice width-wise into thing rounds or rings. For strands, cut the top and bottom off the red onion, then cut in half lengthwise then slice into thin strands — leaving half-rings. The reason for the options is that some people do not like the rings, and feel that that is just too much onion in every bite. Red onions are stronger and have more bite than yellow onions, so cutting in half and then into strands will make the onion flavor a bit milder in every bite. Again, feel free to use your mandolin for the onions as well.

166220132

Combine Vegetables

In a large mixing bowl, combine all of your vegetables together and add salt and pepper to taste. We tend to go a little heavy on the pepper, sprinkling all over the top of the vegetables, and just a hefty pinch of salt. You can use any type of salt you like, but we prefer kosher salt as the best. Once seasoned, give the vegetables a toss and stir, ensuring that all the veggies come into contact with the spices.

78460316

Prepare Your Vinaigrette

We use a “quick vinaigrette” for this marinade; this is a bit different than a emulsified vinaigrette, but gives a much better quality salad. As opposed to a traditional vinaigrette, you combine all the ingredients at once, instead of slowly drizzling in the oil. The reason we do this is that an emulsified vinaigrette will thicken too much and turn into a fatty thick dressing during the marinating. With the quick vinaigrette, the mixture remains thinner and better coats and marinates the vegetables.

To make the quick vinaigrette, combine Olive Oil, Red Wine Vinegar, Chopped Garlic, and Worcestershire Sauce in a separate small bowl. Once combined, use a wire whisk or a fork to whip the mixture together (for about a minute). Vinaigrette should come together and thicken a bit, but remain a fairly loose mixture. And that’s it!

HINT: Use a quick vinaigrette on other veggies, chicken, shrimp, fish and beef as a marinade as well

Your Gazpacho salad is almost done. Now just drizzle the vinaigrette over all of the vegetables in the large mixing bowl and use a spatula to toss everything together — ensuring that all of the vegetables get a taste of the vinaigrette.

Let Your Salad Marinate

Like we said in the introduction, giving the salad time to marinate, soak up the vinaigrette, and let the flavors meld is the real key to this recipe. We use the 8 hour rule to get the perfect flavor and let the vegetables break down a tiny bit. It can be served immediately — as we often did in the restaurant — but at least 4 hours is needed for the vegetables to really soak up some flavor.

500164113

Your Gazpacho salad is ready to enjoy! We don’t usually garnish our salad, but feel free to garnish yours with chopped cilantro or a chopped mint leaves. For extra flavor, we often dress each individual salad serving with blue cheese crumbles and serve alongside fresh baked bread (focaccia goes well with this salad).

Now Enjoy!

Don’t forget to follow us and get all of our delicious recipes as soon as they are published…

Food Items You Should and Shouldn’t Refrigerate

467362980

We all too often simply put all food items into the refrigerator because we tend to believe that all foods need to be kept chilled in order to stay fresh and not spoil. While many prepared items should be refrigerated, there are certain items, produce and products that should not be refrigerated. In this article we will let you know what items should be refrigerated and which ones should be kept at room temperature.

Items That Should Not Be Refrigerated
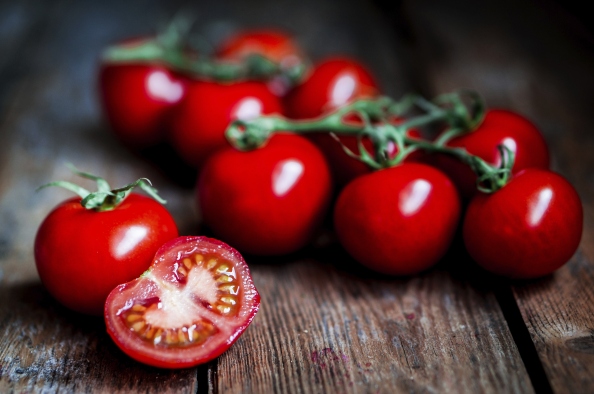
465903697

Tomatoes

Sure, if you slice a tomato and only use half of it, you should put the other half in the refrigerator to extend its life an extra day or so. However, for whole fresh tomatoes, the refrigerator is a death sentence. When in the refrigerator, tomatoes tend to get soft in certain spots, and the meat inside begins to break itself down. Also, you will notice a duller flavor from refrigerated tomatoes, so store tomatoes outside of a bag at room temperature in a bowl or in a pantry.

501619165

Onions

Onions are not favorable of the refrigerator. Not only does the cold dull the bite the have, but onions will not last as long in the refrigerator as they will stored at room temperature. Store onions in a mesh bag or a container that allows them to “breathe.” Another point that is important to note: do not store onions near potatoes. Potatoes emit gasses from them that when absorbed by onions, causes them to begin to rot. If you find soft mushy spots forming quickly in your onions, you can bet that the potatoes are to blame.

174338457

Coffee Grounds

Coffee Beans and coffee grounds are very temperamental when it comes to keeping their flavor “in-tune.” The biggest factor in the change in flavor when refrigerated is the moisture that is in refrigerators and freezers. This moisture attacks the beans and grounds, and leaves the flavor altered in different ways — depending on the original flavor.

523559493

Any Type of Squash

Squash in its various forms (butternut, spaghetti, acorn, etc.) are naturally very durable with their skin. While refrigerating most varieties will not adversely affect or change the flavor of the squash, it is unnecessary.

478253148

Bread Items

The reasons you don’t want to refrigerate bread items such as loaf breads, bagels or tortillas is two-fold. First, the refrigerator will dry out the breads at an exponential rate. Second, there is still moisture circling in the refrigerator, which can lead to mold on the breads at a faster rate. Instead, store bread items at room temperature in a sealed bag.

Items That Should Be Refrigerated

154974006

Dairy Items

This is almost a no-brainer, but should be included as a reminder. One of the most misunderstood dairy items is butter; many believe it is safe to keep butter at room temperature, while many others disagree. Well, both parties are correct to a certain degree. Butter can be left in a covered butter dish at room temperature for 5-7 days, after-which it starts to go bad. You usually will not see the type of spoilage that occurs with milk or yogurt, because butter is mostly fat. However, bacteria will start to form after about a week at room temperature, and some of those bacteria cultures may make you sick.

480508157

Assorted Nuts

This one might be surprising to some, as nuts such as almonds, peanuts, walnuts and other varieties seem like they would be a “dry good” that doesn’t need to be refrigerated. However, you must remember that nuts are a form of produce just like carrots, lettuce and other fruits and vegetables. Make sure to keep them refrigerated to avoid spoilage and bacterial growth.

79711455

Maple Syrup

Probably the biggest reason why we forget to refrigerate maple syrup is that we constantly see bottles of maple syrup on the breakfast table, or near the condiments of our favorite breakfast diners. Maple syrup, however, can spoil if not refrigerated. Many will be surprised to know that maple syrup has an incredible short shelf life — as little as a month for real syrup without any preservative. When refrigerated, maple syrup’s shelf life can be extended for up to a year. Maple syrup is prone to developing mold, especially in the nozzles of bottles, so check you maple syrup often.

478917925

Dried Fruit

Another item that may take many by surprise, dried fruit seems like it would be fine sitting in the pantry at room temperature, but the truth is that people began drying fruit as a way to extend the shelf life of fruits. It is only an extension, and does not make the fruit non-perishable, but extends the shelf life to about 6 months — if refrigerated.

We have barely scratched the surface of what items should and shouldn’t be refrigerated, but these few examples should serve as a reminder that refrigeration is not a miracle worker that makes food items non-perishable. Refrigeration simply extends the shelf life of some items, and other items it can decrease the shelf life.

Eggs Banner

Fresh Chunky Salsa Recipe: Pico De Gallo Style

462398139

Everyone has their own personal preference as to which type of salsa they like best — chunky, smooth, watery, spicy, mild… When it comes to a tomato-based salsa, we prefer a chunky style salsa with medium heat; sort of similar to the “medium” heat salsas you will get served in a less-than-authentic chain Mexican food restaurant. Don’t get us wrong, we love the smooth red and green salsas that are more authentic, but salsa in the pico de gallo style is simply a personal favorite, and is very easy to make. You can make a big batch of this salsa and keep it in the refrigerator for a moderately healthy snack.

Pico De Gallo Style Salsa

Again, this style of salsa mimics pico de gallo, also called salsa fresca. Pico de gallo is technically more of a fresh salad rather than a sauce. With big chunks of fresh vegetables and a bit of tang from the lime juice, this salsa recipe could almost constitute a side dish.

Salsa Ingredients

There are very few ingredients to this recipe, but it is very important to make sure that your vegetables are very fresh. It is important to note that if you do not like the taste of cilantro — and there are many that do not — you can always substitute fresh parsley or leave it out completely. Also, we use Serrano chilies to get the medium heat, but if you want your salsa spicier, you can use 1 jalapeno instead. (NOTE: We are in Arizona, where jalapenos are bred to be much spicier than in other parts of the US. Outside of Mexico and Arizona, jalapenos will usually be milder than serranos by a bit). Thank you to several readers for feedback on this fact.)

  • 1/2 Cup of Fresh Cilantro (Sub Parsley)
  • 1 Large White or Yellow Onion
  • 2 Large Tomatoes or 3-4 Roma Tomatoes
  • 2 Serrano Chilies or 1 Jalapeno Pepper
  • 1-2 Fresh Limes
  • 1 Teaspoon of Rice Wine Vinegar

Directions For Making Salsa

  • As we said before, this recipe is incredibly easy and takes almost no time at all. The first thing you have to do is dice your tomatoes and onions into the perfect size; pieces should be a bit smaller than the size of a dime.
  • Next, we cut the Seranno or jalapeno chilies — depending on your preference. Split the chili down the middle and scrape the seeds out to discard. Next, mince the chilies as small as you can make them so that the heat from the peppers covers over all of the other vegetables.
  • Now, chop your fresh cilantro or parsley roughly and add to the rest of the vegetables. Give everything a stir.
  • The next step is to add your lime juice. Simply cut the limes in half and squeeze as much juice out of the limes as you can get. There should be a very minimal amount of lime juice, but if you have some dry limes, feel free to add an extra half of a lime squeeze.
  • The final step is to add a splash of rice wine vinegar into the mix. We find that it helps the lime juice to work its magic on the fresh ingredients and adds even more depth to the flavoring of the salsa.

That’s It!

Your Salsa is complete and can be eaten right away; however, the longer that the lime and vinegar has a chance to soak up, the more blended the flavor of the salsa will be.

491140637

What Chips Go Best With Salsa?

Now that our salsa is prepared, we can talk about the best chips to eat with salsa. Like we said previously, this recipe is meant to mimic the very non-traditional Mexican restaurant chain style salsas, so we like to go with the non-traditional restaurant style chips with this recipe. Below are some of our favorite restaurant style tortilla chips:

(Click Images to Order)

On The Border Restaurant Style Chips

Parade Restaurant Style Chips


Delicious Pickled Items You Should Try

177578403

Pickled vegetables and other food items have been around for thousands of years. An ancient form of preservation that preceded modern preservation methods, not only will pickling give you a great source of preserving your own foods, but the pickling process itself will leave you with an extremely flavorful product that can be served on salads, alongside meats and other proteins, or can be eaten by themselves.

Pickled Meats

We will start with what is considered the strangest of pickled items: pickled meats. While this sounds strange, it is actually a great way to preserve game meats and other proteins, and the flavor is amazing. Probably the most famous “pickled meat” is corned beef. Corned beef is usually cooked, but goes through a pickling process not for preservation, but for added flavor. That distinctive flavor of corned beef is a taste of what you’ll get when you try some of the more obscure pickled meats, so keep an open mind and give a few a try!

Meats That Are Pickled:

  • Pickled Kielbasa
  • Pickled Bologna
  • Pickled Sausages
  • Pickled Ham Hocks
  • Pickled Octopus
  • Pickled Bacon (Harder to find, but delicious)

Pickled Vegetables

Pickled vegetables are the most commonly pickled item, with pickled cucumbers commonly referred to as simply “pickles.” There are lots of other vegetables though that are just as delicious and should be more commonly served.

Vegetables That Are Pickled:

  • Pickled Okra
  • Pickled Cauliflower
  • Pickled Peppers (often called peperocini)
  • Pickled Eggplant
  • Pickled Leeks
  • Pickled Beets
  • Pickled Celery Sticks
  • Pickled Onions

Pickled Fruits

This one might also sound a bit strange, but the tangy flavor of many fruits really comes through well when they are pickled.

Fruits That Are Pickled:

  • Pickled Watermelon Rinds (the juice is used as a condiment. Don’t eat the rinds!)
  • Pickled Pears
  • Pickled Figs
  • Pickled Lemons
  • Pickled Grapes
  • Pickled Mango
  • Pickled Pineapple

How To Make Pickling Brine

Pickling brine is really easy to make, it contains only a few ingredients — excluding the items being pickled — and just takes a little bit of time to preserve the items and for them to drink up all the flavor of the brine. The ingredients are always the same, simply keep the same proportions of ingredients and change the amounts to meet the amount of pickling brine that you need.

Ingredients: (For 4 Pounds of Vegetables, Meats, or Fruit)

  • 2 3/4 Vinegar (White, White Wine, Red Wine, Rice Wine, or Cider Vinegar) The only type of vinegar that we have found does not work is balsamic vinegar. Each vinegar type will give a different flavor to the pickle.
  • 3 Cups of Water
  • 1/4 Cup of Sea Salt (It needs to be Sea Salt that is coarse. Iodized salt doesn’t work as well and will leave the brine looking cloudy).

And That Is All There Is To It…

Try out pickling for yourself and have delicious pickled vegetables, meat and fruits year-round for less expense…

Want To Stock Up On Pickling Jars?
Have Them Delivered Right To Your House Via Amazon:


Why You Need To Purchase A Kitchen Slicing Mandolin

126845835

The kitchen mandolin is one of the least understood, yet most utilitarian kitchen devices that are on the market today. There are so many dishes that can be improved with just the use of this kitchen gadget, that after owning one, you won’t know how you ever lived without one.

What Is A Kitchen Mandolin?

A kitchen mandolin is really just a sharp blade on a flat plane with a blade adjustment that allows cooks to slice thinly through vegetables and other food items. The adjustable blade not only allows you to cut items into almost paper-thin slices, but can also allow you to get the exact same cut thickness every single time.

The Dangers of the Kitchen Slicing Mandolin

The “dangers” of using a kitchen mandolin are probably the biggest reason why more cooks don’t regularly use a mandolin. While you can injure yourself if you are not using this kitchen tool properly — and we have seen it happen — the dangers of using one are extremely over-hyped. Using the tool properly, and paying attention to what you are doing, will allow you to use the mandolin effectively and without the risk of any accidents — just like almost every other tool in the kitchen.

Slicing With A Kitchen Mandolin

Once you realize just how thin you can slice vegetables with a mandolin, your eyes will open to the wide array of dishes that can be improved with extra thin slices. For example:

  • Potato Chips — If you are a fan of ridiculously thin potato chips, the mandolin slicer will give your potatoes such a thin and clean slice, you won’t be afraid to make your own homemade potato chips or kettle chips.
  • Cucumber Slices — Thin slices of vegetables always seem to taste better, and that is perfectly apparent with cucumber slices. Cucumbers can have a strong sort of chlorophyll/plant taste to them.
  • Garlic — An iconic scene in the movie “Goodfellas,” shows a cook who uses a razor blade to cut slices of garlic so thin that they disappear into heated oil, infusing it with garlic flavor. Mandolin’s are razor sharp and actually much safer that trying to slice a small garlic clove using nothing but a loose razor blade.
  • Onions — One of our favorite uses for the mandolin, onions can be quite pungent and have a strong flavor that can stay with you for hours. With extremely thing slices of onions, the flavor will meld better into raw dishes such as salads, and will melt away in soups, sauces and other cooked dishes.
  • Vegetables You Don’t Like — There are lots of vegetables out there that some of us simply don’t like the taste of, yet we are told to eat more of them due to the positive health benefits they hold. Just like onions, garlic, and cucumbers, you can tone down the strong flavors of many vegetables simply by slicing them extremely thinly.

A wonderful kitchen tool, with a multitude of uses, the kitchen mandolin should be in every serious home cook’s kitchen. Get yours today and start experimenting with new recipes, or try out your old recipes with thinner sliced vegetables.

Buy Your Kitchen Mandolin Online Right Now:

Get Our Favorite Kitchen Mandolin Slicer Below:

The Best Tomatoes For Cooking Sauces

ThinkstockPhotos-465252147

Every gardener knows that nothing beats the taste of biting into a freshly grown tomato from your garden. Selecting tomatoes for sandwiches and salads, however, is different than those used for cooking. Tomatoes for sauces generally are meatier and denser than those eaten fresh.

When selecting the best tomatoes for cooking sauces, the experts at the Italian Home Cooking Blog suggest planting the following varieties.

Super Italian Paste

This Italian heirloom is reddish-orange in color and has piquant and firm flesh along with a lot of flavor. Plants produce lots of elongated six-inch long fruit that hold well after ripening.

Amish Paste

Originating in the Pennsylvania Amish country, this tomato is also good for eating fresh. It is a large, meaty, bright red tomato that many cooks believe is the ultimate paste tomato.

Roma

One of the most popular varieties, Roma tomatoes have few seeds in a very meaty interior. It has high levels of sugar, acids and pectin. Roma packs an incredible taste that intensifies when it cooks.

Viva Italia

These vigorous plants yield 3 oz. fruits that are ideal for soups and homemade ketchup.

San Marzano

This heirloom tomato features long, blocky fruit that matures in 80 days. They contain a small seed cavity that can be easily scooped out, leaving behind savory meat that is ideal for making sauces and for canning.

Big Mama

Plum-shaped and extremely meaty, Big Mama is an enormous tomato that grows as large as five inches long and three inches wide. This variety is easy to peel and core and is geared toward thick, homemade sauces.

Little Mama

Little Mama produces huge clusters of small Roma-like fruit on vigorous vines. The firm, rich flesh cooks into a dense sauce, while the raspberry-red skin is thin and perfect, guaranteeing that every dish looks as good as it tastes.

Tangerine Mama

With a gorgeous orange color that stays that way even during cooking, Tangerine Mama has fruit with rich, tangy flavor that adds zest to any sauce.


If you do not growing your own tomatoes, always choose ones at the store that are firm and not overripe for the best results.

For more advice and delicious cooking tips, visit us often at the Italian Home Kitchen Blog.

You Will Fall In Love With Grass-Fed Butter

ThinkstockPhotos-179875636

Many people think of butter as merely a cooking ingredient, but did you know that it can be a health food too? The health benefits of butter from grass-fed cows is undeniable, and the flavor is noticeably better as well – it is creamier and richer than the nameless brands at the grocery store. Organic butter is not always grass-fed, but there are ways to determine which brands are in fact from grass-fed cows.

The most obvious difference when you eat food that has butter from grass-fed cows is that it tastes much richer than regular grocery store butter. A factor in this is that it has measurably higher quantities of vitamins A, D, and K2, and also has high levels of conjugated linoleic acid, which has been shown to prevent heart disease. These micro-nutrients give a different balance to the butter, which leads to a taste that many people prefer. On a side note, the complexity of the flavor means you probably do not need as much of it in your food, which offsets the fact that it is likely more expensive than regular butter.

Butter from grass-fed cows can be a little confusing for the average shopper, however, because the term is not as widely known. You have likely seen organic butter at the store, and you may think that this is the same thing, but it is often not the case. Many organic butters are not grass-fed, and if unless the packaging specifically says it’s grass-fed, it likely is not. Be aware of this difference when shopping.

If your grocery store does not sell it, you may want to look at local farmer’s markets or a group like the Weston A Price Foundation, which promotes the knowledge and interest in butter from grass-fed cows. There are some states in the United States that do not allow farms to directly sell this butter to consumers, but if that is not the case for you, these are excellent resources.

The advantages of grass-fed butter are fantastic – it tastes better, it is healthier, and it is probably easy to find with a little research.

Follow us for more information, including some of the tastiest recipes you will find on the web!