How to Make Homemade SpaghettiO’s

104631942Children and adults alike love the taste of SpaghettiO’s. Put a new spin on this classic with the following recipe, and bring out your inner child. You’ll save money by making it at home instead of spending money on a can, and you’ll have enough to feed your family or save the rest for leftovers. This variety is also healthier, so you’ll feel good about giving it to your children.

What You’ll Need:

  • 8 tablespoons of unsalted butter
  • 2 cloves of garlic, minced
  • 1 small yellow onion, minced
  • 2 tablespoons of tomato paste
  • One 24-ounce can of tomato puree
  • 4 teaspoons of kosher salt, plus extra
  • 3 teaspoons of sugar
  • freshly ground black pepper
  • ¾ pound ground beef
  • ¾ pound anelletti pasta
  • ¾ cup freshly grated Parmesan cheese, plus extra

Instructions

  1. Making the Sauce

Melt 2 tablespoons of the butter over medium-high heat in a 4-quart saucepan. Add the onion and garlic and cook about 3 to 4 minutes, until soft. Add the tomato paste and cook for 2 more minutes. Add the remaining butter, tomato puree, the sugar, 2 teaspoons of salt, pepper to taste, and ¼ cup of water. Cook about 5 minutes, until thick.

  1. Making the Meatballs

Mix rest of the salt (2 teaspoons) with the ground beef. Roll the meat into ¾-inch balls in the palm of your hands. Place the meatballs into the sauce and reduce heat to medium. Cook about 6 to 8 minutes, until the meatballs are cooked through.

  1. Cooking the Pasta

Generously salt water in a large pot and bring to a boil. Add the pasta to the boiling water. Cook about 13 minutes, until the pasta is al dente, stirring occasionally. Drain the pasta, and then add it to the saucepan along with the Parmesan cheese. Serve right away with the rest of the cheese on the side.

This recipe serves four and takes about 40 minutes to prepare and cook. Bring a smile to your child’s face and your own with this homemade version of SpaghettiO’s.

Please LIKE and FOLLOW for future posts about everything yummy from the world.

How to Make Your Own Vegetarian Lasagna


Lasagna close up

Lasagna is a common dish loved by many, and it doesn’t need meat in order to taste great. Enjoy this filling and healthy meal all by itself, or pair it with a nice salad for an extra green touch. Those who normally eat their lasagna with beef won’t miss the meat with this great recipe. It’s the perfect meal for vegetarians and meat lovers alike. Serve it at your next dinner party or potluck for an instant hit. Or can make it for yourself so you won’t have to share it with anyone.

What You’ll Need

  • 1 package of lasagna noodles
  • one 24-ounce jar of tomato pasta sauce, or other sauce of your choice
  • 3 eggs well beaten
  • one 8-ounce package of sliced mushrooms
  • 2 medium zucchinis, sliced
  • fresh spinach, washed and cut
  • 12 ounces of shredded mozzarella cheese
  • 8 ounces of grated Parmesan cheese
  • olive oil spray, or any other spray of your choice

Mix the beaten eggs and cottage cheese in a bowl. In another bowl or on a plate, combine the mozzarella and cottage cheese. Lastly, in a separate bowl, mix together the pasta sauce, sliced zucchini, sliced mushrooms and spinach.

Spray oil onto a 9 x 13 inch baking pan. Cook the lasagna until soft. Rinse the lasagna under cold water to rinse off the starch, and line it in the bottom of the pan.

Spoon the pasta sauce mixed with the zucchini, mushrooms and spinach over the noodles to form a thin cover. Add the cottage cheese and egg mixture over the pasta sauce with a large spoon.

Add another layer of noodles, and repeat all steps until all the ingredients have been added. Make sure the cheese mixture is on top.

Bake at 350 degrees in a preheated oven for 35 to 40 minutes. The cheese should look bubbled and the top should be toasty but not burnt.

You can serve your vegetarian lasagna straight from the oven, as it doesn’t need time to cool. Lasagna also makes excellent leftovers, so you can cook this up just for yourself and enjoy the flavor all week.

Please LIKE and FOLLOW for future posts about everything yummy from around the world.

How to Make Pumpkin Spice Lattes, Avoid the Lines and Save Some Money

185148026Ah, the pumpkin spice latte. It’s become a seasonal favorite, but it doesn’t come cheap, and you often have to wait in frustratingly long lines in order to secure your frothy, spicy treat. Fortunately, it’s not that hard to make a fantastic pumpkin spice latte at home, and save yourself some time and money in the process.

If you’re making a PSL at home, you may as well make it extra special. This recipe—unlike many coffee shop pumpkin spice lattes—actually contains pumpkin instead of just pumpkin flavored syrup!

You’ll need the following ingredients and quantities to make your latte:

  • 2 Tbsp canned pumpkin
  • 2 cups whole milk
  • 1-2 shots espresso
  • ½ tsp pumpkin pie spice, more to garnish
  • 2 Tbsp sugar
  • 2 Tbsp pure vanilla extract
  • Fresh-ground black pepper
  • ¼ cup heavy cream, whipped

You’ll also need the following equipment to prepare your drink:

  • Espresso maker or coffee maker
  • Blender
  • Whisk
  • Hand blender or mixer
  • Wooden spoon
  • Saucepan

The first step is to warm the pumpkin, spices and black pepper for about two minutes over medium heat until the mixture is hot and smells cooked. Stir the entire time so that the pumpkin doesn’t burn onto the bottom of the saucepan.

Next, stir in the sugar until the entire preparation has become a thick, dark syrup.

Add the milk and vanilla together and blend then into the syrup with the whisk. Keep the pan over medium to low heat and stir until the milk is warm. If the heat is too high or you stop stirring, the milk may bubble over.

Use a hand blender or traditional blender to quickly blend the heated milk mixture until it is light and frothy.

Finally, add espresso or coffee to the frothed milk, top with whipped cream and dust with a bit more pumpkin pie spice. You should have enough for two mugs of your homemade pumpkin spice latte.

Not only will homemade PSL’s allow you to skip the lines and save a little money (those $5 espresso drinks add up!) but they will also allow you to enjoy these beloved seasonal beverages any time of the year.

Thank you for reading, and please keep following our blog for more recipes and tips!

Quick and Easy Bread Recipes You Can Do Yourself

484163886Have you ever wanted to bake some hearty, homemade bread but then realized you didn’t have all day to prepare dough, let it rise, and then (finally) bake it? Well here’s a secret: not all delicious homemade breads require half a day to bake. There are a variety of recipes that use baking powder or baking soda, instead of traditional yeast, for leavening, cutting your preparation time by at least half. You can make sweet and savory loaves, muffins, scones, biscuits, pancakes and even popovers without taking hours out of your day.

We have compiled a list of some of the best-loved and best-rated quick bread recipes, all of which you can easily make with your own two hands. These tried-and-true recipes will enable you to have a sweet or savory bread on your table in a pinch.

Popovers and Pancakes

Classic Popovers

Whole-Wheat Buttermilk Pancakes

Carrot Cake Pancakes

Biscuits and Scones

Flaky Buttermilk Biscuits

Spiced Pumpkin Biscuits

Classic Scones

Chocolate Chip Scones

Muffins

Tuscan Lemon Muffins

Chocolate Chip-Coffee Muffins

Blueberry and Oatmeal Muffins

Pumpkin Cranberry Muffins

Raspberry Cream Cheese Muffins

Morning Glory Muffins

Lemon Blueberry Muffins

Whole-Wheat, Oatmeal and Raisin Muffins

Savory Loaves

Basic Beer-Cheese Bread

Kalamata Olive Bread with Oregano

Brown Soda Bread

Maple-Stout Quick Bread

Sweet Loaves

Orange-Pecan Tea Bread

Peanut Butter Banana Bread

Zucchini-Pineapple Quick Bread

Pecan-Topped Pumpkin Bread

Coconut Banana Bread with Lime Glaze

Garden Harvest Bread

Classic Banana Bread

Sweet Potato Bread

Almond Bread

Walnut Streusel Bread

Kumquat-Cranberry Cornmeal Loaf

Whether you’re making a savory loaf to accompany your dinner, a batch of muffins for your afternoon snack, or a round of pancakes for a Saturday morning family breakfast, we have a recipe that you can whip up—and have on your table—in no time.

When you need to make bread in a pinch, remember to look out for recipes that use baking soda or baking powder for leavening—these recipes will always save you time and effort.

Don’t forget to follow our blog and check back soon for more delicious, quick-and-easy recipes!

Squashes And Gourds You Should Cook With This Fall

493275970

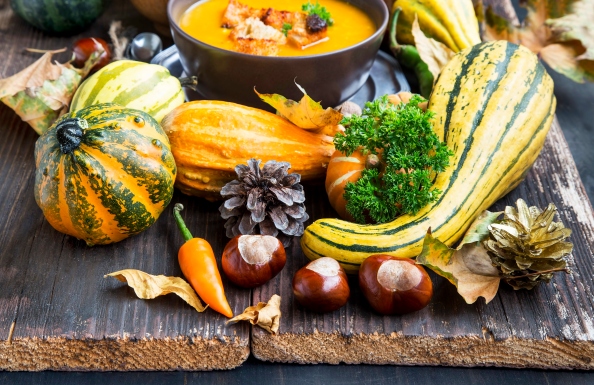
Seeing as how we are well into fall and the autumn season, today we are going to be talking about fall gourds and squash types — as they become quite prevalent in recipes and decorations this time of year — and the best varieties for cooking. First thing we need to talk about are the varieties of gourds, squash and pumpkins that are NOT EDIBLE.

Types of Gourds, Squash and Pumpkins You CAN NOT EAT

Unfortunately, this time of year, the grocery stores fill their produce sections with both inedible and edible gourds — quite often right next to each other. For a lay person, it could be quite difficult to tell if the gourd or squash type you are looking at is for cooking or simply for decoration. The following types of squash and gourds are only for decoration and should not be eaten:

  • Angel Wing
  • Apple Gourd
  • Baby Bear
  • Gooseneck
  • Jack Be Quick

While the Jack Be Quick’s are the tiny miniature pumpkins you most often see for decoration this time of year, most of us recognize them as being inedible; the other types are a bit tougher to recognize. Angel wing can come in green, yellow or orange colors and look much like a striped zucchini. You can recognize an angel wing by the way it clubs outward at the fat end, like a medieval spiked club.

Apple Gourds looks a lot like a miniature watermelon, with emerald looking surface, but quickly turns a sickly amber yellow color when dried. This type of gourd should only be used for decoration. Gooseneck’s look similar to the apple gourd in size and color, but have a long goosenecked top half.

Baby bear’s look much like your traditional Halloween pumpkin, though smaller and in an almost perfect ball shape. These cause much of the confusion in the grocery stores, as they are not edible, but look very similar to edible pumpkins. Today, many grocery stores do not carry baby bears, due to the confusion they can easily cause.

Traditional pumpkins, like the type that we carve every year, are considered ‘edible, but not often used for cooking.’ You may be shocked to hear that the pumpkins so popular in America today are not usually considered a food-grade piece of produce, but it is quite true. While roasted pumpkin seeds are delicious, and even pumpkin meat can be delicious in some recipes, they are often considered a “garbage” gourd fed to pigs, grown to ridiculous sizes for show, or carved to be used as decoration for a night or two.

Squash and Gourds You Can Cook With

Now we will get into the good stuff, gourds and squash that can be cooked and turned into delicious recipes. While you may not be able to find all of these types in your local market, they can be ordered and shipped online, and can be found in local specialty markets. These will often show up in grocery stores in the fall, but if you can;t find them locally, try ordering them online to taste and try these squashes and gourds.

  • Acorn Squash — One of the more popular squash types for cooking, these are aromatic and have a sweeter flesh than pumpkin. They are usually green all over, with a yellow spot where they touched the ground. Lock for a clean edged yellow spot; if there is too much yellow covering the squash, it is likely over-ripened.
  • Blue Hubbard — A white gourd about the same size as an acorn squash, this variety comes from Marblehead, Massachusetts — developed in 1840 — and is less sweet and more of a cucumber flavor.
  • Butternut Squash — Our personal favorites for soups and chili, the butternut squash is about the sweetest of the squash, though is meaty and rich in flavor. With less strings inside and a thin shell, it is also the easiest to work with, making it preferred for cooking.
  • Cushaw — Most often used in the more savory dishes, this type has a long and slightly curved neck, is usually a brownish tan, and has a thin skin like butternut squash. These come in a dark green variety also that can be confused with the inedible gooseneck squash, so be wary.
  • Turks Turban — Looking much like a pillowy turkish hat with orange and blue-green stripes, there is very little flesh on this variety, though it has one of the mildest flavors that makes it go well in a large amount of both sweet and savory recipes. The extra large seed size makes this a favorite for roasted seed recipes.

Our Favorite Recipes Using Gourds and Squash

There are so many great dishes you can add squash and gourds to in order to really round out the flavor of the dish and build extra layers of flavor within. Our favorite use of gourds is in chili, where the flesh of roasted gourds and squash can be used as a thickener and a base. The best way to start cooking with gourds and squash it to roast them and taste them to get a sense of their natural flavor. Once you know what each variety tastes like, incorporating them into your favorite recipes is a snap.

Check Out 55 Healthy Gourd and Squash Recipes HERE >>

And Make Sure to Follow Us For More Delicious Articles and Ideas…
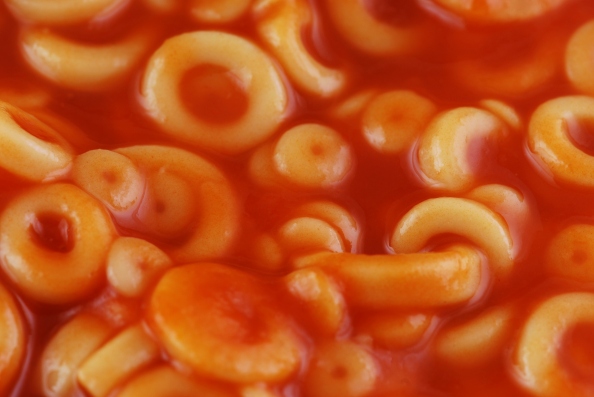
Tips For Cooking Salmon Perfectly

465877365

Salmon fillets and steaks are yummy, but it is not the easiest of things to cook salmon well. So, here are a few salmon cooking tips which would help you sidestep the usual errors and will save you the blushes when it is serve-up time!

Salmon Cooking Tips

Poach, Grill, or Pan Sear?

You can employ any of these methods, but you will need to go the right way. When poaching, many commit the common mistake of poaching the fish in plain water, though when poaching, you are missing on a great opportunity to add flavors. We say if you should poach, poach the salmon in milk, chicken stock, or fish broth and try flavors with lemon, peppercorns, bay leaves, etc.—whatever suits your fancy. It is also a great idea to poach the fish in dry white wine.

If you are grilling or hot-smoking, use only pre-soaked wood chips—try alder, hickory or maple. Lower the heat once it starts to smoke and keep the temperature inside the smoker at no higher than 80-90C.

In case of pan-frying, use a heavy non-stick frying pan and use olive oil or butter (heated in medium high-heat) to cook your salmon.

Choose the Right Salmon

If you are going for steak or fillet, make sure that you pick pieces all of uniform size and thickness. A center cut is normally your best option. Also, do not go for whatever is there in offer. Organically raised salmon tastes the best. They are normally more expensive, but you will also get the best of your salmon if you choose those varieties.

Do Not Rip the Skin Off

This is another common mistake you can make when cooking salmon. There are some recipes which may advise you to get rid of the skin, but we at Italian Home Kitchen Blog say that it is best that you do not, especially when you are pan-searing or grilling. The skin provides a nice safety layer between the soft salmon flesh and the surface of the grill or the hot pan. Cook the skin-side down and ALWAYS cook in lower heat.

Follow these tips and chances are slim that you will ever go wrong in cooking your salmon again.


Easiest Soft Boiled Egg Recipe That Works Every Time

472147894

We love soft boiled eggs; they are truly a quick and easy breakfast item that is healthy, affordable, and savory. Many cooks out there avoid soft boiled eggs, however, thinking that getting a perfect soft boiled egg is a hard task. In actuality, cooking the perfect soft boiled egg is not a hard task at all, you just have to follow the one and only recipe instructions 100% exactly. This method for soft boiled eggs was originally created by America’s Test Kitchen, which had to test over 1,000 eggs before they got the perfect method. This method is incredibly simple; just follow the instructions, and you will end up with perfectly set egg whites and a warm and creamy yolk.

Water For Soft Boiled Eggs

The secret to perfect soft boiled eggs has to do with the amount of water used, and time. we want to use very little water, and actually steam the eggs, rather than boil them. This means that the eggs will not be fully covered with water, rather the water at the bottom of the pot should be shallow and just enough to create a steam environment for the eggs to soft cook. You can use any size or shaped pot, as long as hit has a lid that will fit tightly, and 1/2 inch of water at the bottom.

Eggs Water Level

STEP 1

Bring your 1/2 inch of water to a full boil (with the lid on) until a steam chamber is created.

STEP 2

Take your eggs out of the refrigerator and add to the pot of boiled water/steam (Note: eggs should be well chilled in the refrigerator just prior to adding to the pot, for the soft boil to turn out perfectly).

Step 3

Cover with the lid and start your egg timer or stopwatch function on your smartphone and set to 6 and a half minutes exactly.

Step 4

After exactly six and a half minutes, remove the eggs from the pot and quickly rinse the eggs in cold water from the tap for about 15 seconds each.

Step 5

Crack the eggs with the back of a knife or with an egg topper to reveal perfectly cooked soft boiled eggs.

Enjoy!

It is just that simple. as long as your pot had steam and the eggs cooked for exactly 6.5 minutes, you will have perfectly cooked soft boiled eggs every time. This method will work with any number of eggs as long as the bottom of the pot can fit the eggs in a 1/2 inch of water. Once you try this method a few times, you will become confident that the eggs will turn out every time, and you will surely be serving more soft boiled eggs in your home.

468458136

Want to Get Perfectly Cracked Soft Boiled Eggs Every Time?
Get Our Favorite Egg Topper That Cracks Eggs Perfectly and Makes Attractive Plating:


Cheap Meat Cuts You Can Turn Into Delicious Dishes

450056783

The prices of meats are rising and settling at all times; though, while the prices of expensive cuts of meats always remain high-yet-competitive, the prices of cheaper cuts of meats remain low-yet-competitive. This means that you can pick up some cheaper cuts of meat and still create a delicious and decadent meal — as long as you know how to use the cuts of meat. Here are some cheaper cuts of meat and ideas of how to use them:

158681720

Flat Iron Steak

Also known as ‘top blade’ the flat iron cut is nontraditional yet versatile and comes from the shoulders of cows. Although fillet and sirloin are tenderer, flat iron steak is both affordable and delicious. It can be prepared in various ways like pan frying, grilling, marinating and braising among others. Caution should however be observed to avoid overcooking.

Get A Delicious Flat Iron Steak Recipe HERE >>

536168903

Beef Chuck

This is another cheap cut which comes from steers’ shoulders. It can be chopped up for stew or braised whole. Beef chuck has connective tissues which tenderize it and adds flavor. The secret with this cut is to cook it slowly. Beef chuck pot roast is a traditional one-pot meal which works well for both family dinners and parties.

Get Our Best Beef Chuck Pot Roast Recipe HERE >>

512186161

Pork Shoulder

This is one of the most affordable meat options out there. An average bone-in shoulder could feed a family of four, and typically costs less than $10  for 3 pounds. It responds very well to shredding and slow cooking, which means one can set and leave it to attend to other chores.

Get Our Favorite Pork Shoulder Recipe HERE >>

479777072

Chicken Thighs and Legs

Chicken is generally affordable. However, the enormous demand for boneless, skinless and breasts tends to drive up the price, especially in urban areas. Still, wings, thighs and legs are usually more affordable yet flavorful. Unlike breasts, they’re also easier to cook properly.

Get Our Favorite Chicken Thigh and Leg Recipe HERE >>

186342858

Sirloin

The sirloin refers to a large-area cut from a cow’s rear back section. Top sirloin tends to be tenderer thus more preferred. If one is looking for something cheaper, the tip sirloin is a leaner cut that goes well for stew, kebabs and stir-fry. To keep it from becoming dry and chewy, it needs to be marinated for several hours before broiling, grilling or pan-searing.

Get Our Favorite Sirloin Steak Kebab Recipe HERE >>

As you can see, just because some cuts of meat are cheaper, doesn’t mean you can’t make them into great dishes. Thanks to cell phones and mobile devices, finding easy recipes for cheap meats has never been easier. All you have to do is go to your local butcher or grocery meat counter and ask for deals and cheaper cuts that are available that day, and search for recipes for that select cut of meat or ingredient. With the wealth of recipes available online today, you can search through hundreds of recipes and get ideas for your own recipes using these affordable — yet delicious — cuts of meat.

Follow Us For More Ideas on Affordable Meals and More…

All About Leaveners For Baking

480153625

Amateur and accomplished cooks alike will be familiar with leavening agents.  A leavening agent is also known as a raising agent. The baking product is used to create air pockets to ensure baked products rise. The Italian Home Kitchen blog team are passionate about food. However, today, we would like to tell you about the different types of raising agents available. Our team of professional cooks have tested various leavening agents and have come up with an efficient list of raising agents for you to trial.

Alternative Baking Leaveners

  • Ammonium Carbonate or Bakers Ammonia
  • Original Bakewell Cream
  • Instant Clearjel
  • Signature Secrets
  • Cream of Tartar
  • Xanthan Gum
  • Bakewell Cream Baking Powder
  • Whipped Cream Stabilizer

These eight thickening agents and baking leaveners are supreme food thickeners for home baking. All eight effective culinary leavening and thickening agents are used by professional bakers. While many of these types of leaveners may sound exotic, they are commonly used in baking to achieve different textures, tastes and consistencies in doughs, cakes and other baked goods.

General Information about the Eight Baking Leaveners and Thickening Agents

  • Bakers Ammonia (Ammonium Carbonate) was once referred to as Hartshorn.  The chemical cooking leavener was widely used before you could buy baking soda and baking powder. We find this old-fashioned raising agent makes the crispiest crackers and cookies
  • We found Original Bakewell Cream acts in the same way as Cream of Tartar. The gluten-free raising agent is ideal for cookie baking
  • Instant Clearjel is a highly-concentrated thickener.  We discovered the Kosher thickening agent was perfect for making thick fruit pie juices
  • Signature Secrets is a good all-round thickening agent. We whisked the Kosher thickener into cakes, sauces, custards and pies. Our custard pies were unusually creamy and light
  • Cream of Tartar is yet another old-fashioned baking leavener. We used the raising agent in old-fashioned biscuit recipes. Our cooks also used it to make creamy icing and tasty candy. Use cream of tartar to make the perfect meringue, you won’t be disappointed
  • In our opinion, Xanthan Gum is a great emulsifier, stabilizer and baking leavener. The kosher thickening agent is also gluten-free.  We acknowledge some gluten-free treats lack texture and body, however, we discovered Xanthan Gum improves gluten-free recipes
  • The Original Bakewell Cream Baking Powder is an amazing raising agent. The fast-acting, non-aluminium, kosher leavener is ideal for baking muffins, cakes, biscuits and cookies
  • Add a little Kosher whipped cream stabilizer before whipping to prevent the cream from separating. We found the cream stabilizer also helped the dairy product to maintain body and freshness

With the abundance of modern leaveners such as baking powder and instant yeast widely available in grocery stores these days, many of these alternative leaveners are not commonly used anymore; however, if you are using traditional recipes, you may find that they call for these types of leaveners. Some more adventurous bakers may want to try using some of these leaveners, as they offer different textures, and can lead to softer cakes, stretchier doughs, and interesting tastes to all of your baking projects.

Be sure to follow us for more great information and tips for baking, cooking, food and more…

How To Make A Tapenade

478041882

How to Make a Tapenade

Anyone who enjoys eating olives knows that it is fairly easy to incorporate them into your daily life. This includes foods such as anchovy-stuffed olives, Sicilian green olive salad, and a handful of the  Castelvetrano variety brought to work in a container. However, it can be tiresome only to have whole olives all of the time. If this is the case, you may want to try making a tapenade for a party or to have as a snack whenever you wish.

It’s possible to make a tapenade without going by a recipe. You can create a delicious tapenade at home within 30 minutes. Follow these instructions, and you’ll have a gorgeous tapenade in no time. You will love how easy it is to create this spread.

Gather Up Ingredients

The two ingredients that you need are olives and capers. This is the most basic version of tapenade, though you will want to add some other things such as salt, pepper, garlic, olive oil and even anchovies for a stronger flavor.

What type of olives you end up choosing for this depend on your own preference. Choose them carefully, and make sure that you have 2 cups of pitted olives. You may go with Kalamata or green, or you can mix these together. Herbs are a great addition, including thyme, rosemary, basil and oregano among others.  They are best when you get them fresh.

Blend the Ingredients

Use a food processor to create a thick paste from all of the ingredients, besides the olive oil.

Add In Olive Oil

While the food processor is still going, put olive oil in slowly. The tapenade will become slightly more chunky. This should take about a minute or two. Consider if there is oil included in with the olives already to determine how much you will need, but it typically will be from 2 tablespoons to a half cup of oil. Season this mixture with pepper and salt.

Enjoy

Put the tapenade on some crackers, or if you’d prefer, on bread. It is the perfect addition to a sandwich, and it also makes an excellent gift for fellow olive lovers.

Follow Us For The Most Delicious Blog Online!