How to Make Homemade SpaghettiO’s

104631942Children and adults alike love the taste of SpaghettiO’s. Put a new spin on this classic with the following recipe, and bring out your inner child. You’ll save money by making it at home instead of spending money on a can, and you’ll have enough to feed your family or save the rest for leftovers. This variety is also healthier, so you’ll feel good about giving it to your children.

What You’ll Need:

  • 8 tablespoons of unsalted butter
  • 2 cloves of garlic, minced
  • 1 small yellow onion, minced
  • 2 tablespoons of tomato paste
  • One 24-ounce can of tomato puree
  • 4 teaspoons of kosher salt, plus extra
  • 3 teaspoons of sugar
  • freshly ground black pepper
  • ¾ pound ground beef
  • ¾ pound anelletti pasta
  • ¾ cup freshly grated Parmesan cheese, plus extra

Instructions

  1. Making the Sauce

Melt 2 tablespoons of the butter over medium-high heat in a 4-quart saucepan. Add the onion and garlic and cook about 3 to 4 minutes, until soft. Add the tomato paste and cook for 2 more minutes. Add the remaining butter, tomato puree, the sugar, 2 teaspoons of salt, pepper to taste, and ¼ cup of water. Cook about 5 minutes, until thick.

  1. Making the Meatballs

Mix rest of the salt (2 teaspoons) with the ground beef. Roll the meat into ¾-inch balls in the palm of your hands. Place the meatballs into the sauce and reduce heat to medium. Cook about 6 to 8 minutes, until the meatballs are cooked through.

  1. Cooking the Pasta

Generously salt water in a large pot and bring to a boil. Add the pasta to the boiling water. Cook about 13 minutes, until the pasta is al dente, stirring occasionally. Drain the pasta, and then add it to the saucepan along with the Parmesan cheese. Serve right away with the rest of the cheese on the side.

This recipe serves four and takes about 40 minutes to prepare and cook. Bring a smile to your child’s face and your own with this homemade version of SpaghettiO’s.

Please LIKE and FOLLOW for future posts about everything yummy from the world.

How to Make Your Own Vegetarian Lasagna


Lasagna close up

Lasagna is a common dish loved by many, and it doesn’t need meat in order to taste great. Enjoy this filling and healthy meal all by itself, or pair it with a nice salad for an extra green touch. Those who normally eat their lasagna with beef won’t miss the meat with this great recipe. It’s the perfect meal for vegetarians and meat lovers alike. Serve it at your next dinner party or potluck for an instant hit. Or can make it for yourself so you won’t have to share it with anyone.

What You’ll Need

  • 1 package of lasagna noodles
  • one 24-ounce jar of tomato pasta sauce, or other sauce of your choice
  • 3 eggs well beaten
  • one 8-ounce package of sliced mushrooms
  • 2 medium zucchinis, sliced
  • fresh spinach, washed and cut
  • 12 ounces of shredded mozzarella cheese
  • 8 ounces of grated Parmesan cheese
  • olive oil spray, or any other spray of your choice

Mix the beaten eggs and cottage cheese in a bowl. In another bowl or on a plate, combine the mozzarella and cottage cheese. Lastly, in a separate bowl, mix together the pasta sauce, sliced zucchini, sliced mushrooms and spinach.

Spray oil onto a 9 x 13 inch baking pan. Cook the lasagna until soft. Rinse the lasagna under cold water to rinse off the starch, and line it in the bottom of the pan.

Spoon the pasta sauce mixed with the zucchini, mushrooms and spinach over the noodles to form a thin cover. Add the cottage cheese and egg mixture over the pasta sauce with a large spoon.

Add another layer of noodles, and repeat all steps until all the ingredients have been added. Make sure the cheese mixture is on top.

Bake at 350 degrees in a preheated oven for 35 to 40 minutes. The cheese should look bubbled and the top should be toasty but not burnt.

You can serve your vegetarian lasagna straight from the oven, as it doesn’t need time to cool. Lasagna also makes excellent leftovers, so you can cook this up just for yourself and enjoy the flavor all week.

Please LIKE and FOLLOW for future posts about everything yummy from around the world.

How to Make Pumpkin Spice Lattes, Avoid the Lines and Save Some Money

185148026Ah, the pumpkin spice latte. It’s become a seasonal favorite, but it doesn’t come cheap, and you often have to wait in frustratingly long lines in order to secure your frothy, spicy treat. Fortunately, it’s not that hard to make a fantastic pumpkin spice latte at home, and save yourself some time and money in the process.

If you’re making a PSL at home, you may as well make it extra special. This recipe—unlike many coffee shop pumpkin spice lattes—actually contains pumpkin instead of just pumpkin flavored syrup!

You’ll need the following ingredients and quantities to make your latte:

  • 2 Tbsp canned pumpkin
  • 2 cups whole milk
  • 1-2 shots espresso
  • ½ tsp pumpkin pie spice, more to garnish
  • 2 Tbsp sugar
  • 2 Tbsp pure vanilla extract
  • Fresh-ground black pepper
  • ¼ cup heavy cream, whipped

You’ll also need the following equipment to prepare your drink:

  • Espresso maker or coffee maker
  • Blender
  • Whisk
  • Hand blender or mixer
  • Wooden spoon
  • Saucepan

The first step is to warm the pumpkin, spices and black pepper for about two minutes over medium heat until the mixture is hot and smells cooked. Stir the entire time so that the pumpkin doesn’t burn onto the bottom of the saucepan.

Next, stir in the sugar until the entire preparation has become a thick, dark syrup.

Add the milk and vanilla together and blend then into the syrup with the whisk. Keep the pan over medium to low heat and stir until the milk is warm. If the heat is too high or you stop stirring, the milk may bubble over.

Use a hand blender or traditional blender to quickly blend the heated milk mixture until it is light and frothy.

Finally, add espresso or coffee to the frothed milk, top with whipped cream and dust with a bit more pumpkin pie spice. You should have enough for two mugs of your homemade pumpkin spice latte.

Not only will homemade PSL’s allow you to skip the lines and save a little money (those $5 espresso drinks add up!) but they will also allow you to enjoy these beloved seasonal beverages any time of the year.

Thank you for reading, and please keep following our blog for more recipes and tips!

Easiest Soft Boiled Egg Recipe That Works Every Time

472147894

We love soft boiled eggs; they are truly a quick and easy breakfast item that is healthy, affordable, and savory. Many cooks out there avoid soft boiled eggs, however, thinking that getting a perfect soft boiled egg is a hard task. In actuality, cooking the perfect soft boiled egg is not a hard task at all, you just have to follow the one and only recipe instructions 100% exactly. This method for soft boiled eggs was originally created by America’s Test Kitchen, which had to test over 1,000 eggs before they got the perfect method. This method is incredibly simple; just follow the instructions, and you will end up with perfectly set egg whites and a warm and creamy yolk.

Water For Soft Boiled Eggs

The secret to perfect soft boiled eggs has to do with the amount of water used, and time. we want to use very little water, and actually steam the eggs, rather than boil them. This means that the eggs will not be fully covered with water, rather the water at the bottom of the pot should be shallow and just enough to create a steam environment for the eggs to soft cook. You can use any size or shaped pot, as long as hit has a lid that will fit tightly, and 1/2 inch of water at the bottom.

Eggs Water Level

STEP 1

Bring your 1/2 inch of water to a full boil (with the lid on) until a steam chamber is created.

STEP 2

Take your eggs out of the refrigerator and add to the pot of boiled water/steam (Note: eggs should be well chilled in the refrigerator just prior to adding to the pot, for the soft boil to turn out perfectly).

Step 3

Cover with the lid and start your egg timer or stopwatch function on your smartphone and set to 6 and a half minutes exactly.

Step 4

After exactly six and a half minutes, remove the eggs from the pot and quickly rinse the eggs in cold water from the tap for about 15 seconds each.

Step 5

Crack the eggs with the back of a knife or with an egg topper to reveal perfectly cooked soft boiled eggs.

Enjoy!

It is just that simple. as long as your pot had steam and the eggs cooked for exactly 6.5 minutes, you will have perfectly cooked soft boiled eggs every time. This method will work with any number of eggs as long as the bottom of the pot can fit the eggs in a 1/2 inch of water. Once you try this method a few times, you will become confident that the eggs will turn out every time, and you will surely be serving more soft boiled eggs in your home.

468458136

Want to Get Perfectly Cracked Soft Boiled Eggs Every Time?
Get Our Favorite Egg Topper That Cracks Eggs Perfectly and Makes Attractive Plating:


Cheap Meat Cuts You Can Turn Into Delicious Dishes

450056783

The prices of meats are rising and settling at all times; though, while the prices of expensive cuts of meats always remain high-yet-competitive, the prices of cheaper cuts of meats remain low-yet-competitive. This means that you can pick up some cheaper cuts of meat and still create a delicious and decadent meal — as long as you know how to use the cuts of meat. Here are some cheaper cuts of meat and ideas of how to use them:

158681720

Flat Iron Steak

Also known as ‘top blade’ the flat iron cut is nontraditional yet versatile and comes from the shoulders of cows. Although fillet and sirloin are tenderer, flat iron steak is both affordable and delicious. It can be prepared in various ways like pan frying, grilling, marinating and braising among others. Caution should however be observed to avoid overcooking.

Get A Delicious Flat Iron Steak Recipe HERE >>

536168903

Beef Chuck

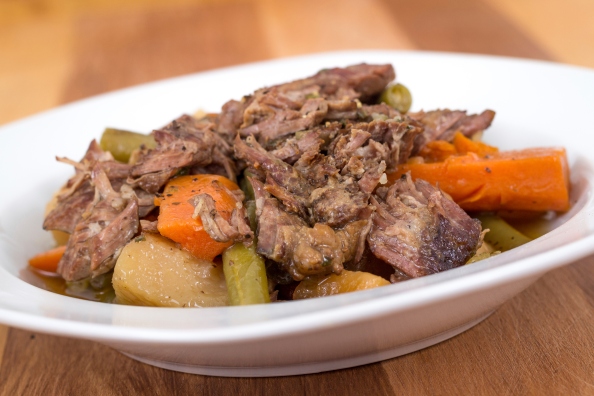
This is another cheap cut which comes from steers’ shoulders. It can be chopped up for stew or braised whole. Beef chuck has connective tissues which tenderize it and adds flavor. The secret with this cut is to cook it slowly. Beef chuck pot roast is a traditional one-pot meal which works well for both family dinners and parties.

Get Our Best Beef Chuck Pot Roast Recipe HERE >>

512186161

Pork Shoulder

This is one of the most affordable meat options out there. An average bone-in shoulder could feed a family of four, and typically costs less than $10  for 3 pounds. It responds very well to shredding and slow cooking, which means one can set and leave it to attend to other chores.

Get Our Favorite Pork Shoulder Recipe HERE >>

479777072

Chicken Thighs and Legs

Chicken is generally affordable. However, the enormous demand for boneless, skinless and breasts tends to drive up the price, especially in urban areas. Still, wings, thighs and legs are usually more affordable yet flavorful. Unlike breasts, they’re also easier to cook properly.

Get Our Favorite Chicken Thigh and Leg Recipe HERE >>

186342858

Sirloin

The sirloin refers to a large-area cut from a cow’s rear back section. Top sirloin tends to be tenderer thus more preferred. If one is looking for something cheaper, the tip sirloin is a leaner cut that goes well for stew, kebabs and stir-fry. To keep it from becoming dry and chewy, it needs to be marinated for several hours before broiling, grilling or pan-searing.

Get Our Favorite Sirloin Steak Kebab Recipe HERE >>

As you can see, just because some cuts of meat are cheaper, doesn’t mean you can’t make them into great dishes. Thanks to cell phones and mobile devices, finding easy recipes for cheap meats has never been easier. All you have to do is go to your local butcher or grocery meat counter and ask for deals and cheaper cuts that are available that day, and search for recipes for that select cut of meat or ingredient. With the wealth of recipes available online today, you can search through hundreds of recipes and get ideas for your own recipes using these affordable — yet delicious — cuts of meat.

Follow Us For More Ideas on Affordable Meals and More…

How To Make A Tapenade

478041882

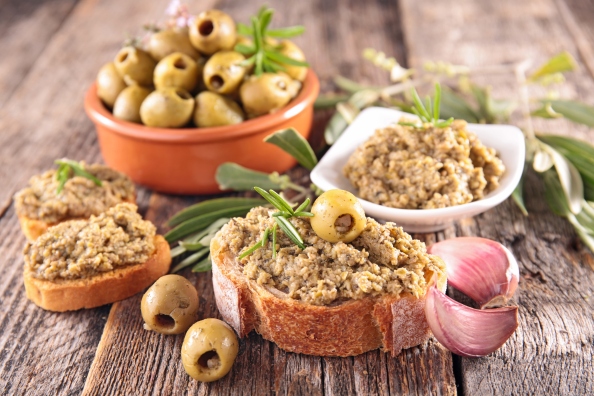
How to Make a Tapenade

Anyone who enjoys eating olives knows that it is fairly easy to incorporate them into your daily life. This includes foods such as anchovy-stuffed olives, Sicilian green olive salad, and a handful of the  Castelvetrano variety brought to work in a container. However, it can be tiresome only to have whole olives all of the time. If this is the case, you may want to try making a tapenade for a party or to have as a snack whenever you wish.

It’s possible to make a tapenade without going by a recipe. You can create a delicious tapenade at home within 30 minutes. Follow these instructions, and you’ll have a gorgeous tapenade in no time. You will love how easy it is to create this spread.

Gather Up Ingredients

The two ingredients that you need are olives and capers. This is the most basic version of tapenade, though you will want to add some other things such as salt, pepper, garlic, olive oil and even anchovies for a stronger flavor.

What type of olives you end up choosing for this depend on your own preference. Choose them carefully, and make sure that you have 2 cups of pitted olives. You may go with Kalamata or green, or you can mix these together. Herbs are a great addition, including thyme, rosemary, basil and oregano among others.  They are best when you get them fresh.

Blend the Ingredients

Use a food processor to create a thick paste from all of the ingredients, besides the olive oil.

Add In Olive Oil

While the food processor is still going, put olive oil in slowly. The tapenade will become slightly more chunky. This should take about a minute or two. Consider if there is oil included in with the olives already to determine how much you will need, but it typically will be from 2 tablespoons to a half cup of oil. Season this mixture with pepper and salt.

Enjoy

Put the tapenade on some crackers, or if you’d prefer, on bread. It is the perfect addition to a sandwich, and it also makes an excellent gift for fellow olive lovers.

Follow Us For The Most Delicious Blog Online!

Easy Gazpacho Salad Recipe

178156040

Delicious marinated vegetables are the star in our easy gazpacho salad recipe; comprised of fresh cucumbers, tomatoes and red onions. This is just about the easiest recipe in our collection and can be made quickly. Just like our Cannellini Relish recipe, the trick to this recipe is just to let the vegetables marinated for 8-12 hours to let the vegetables soak up all that delicious vinaigrette. This recipe is so quick and simple that we used to make it in a fix at the restaurant, or substitute this salad for others if we ran out of ingredients.

How to Make Gazpacho Salad

Ingredients:

  • 3 Medium Roma Tomatoes
  • 1 Medium to Large Red Onion
  • 1 Cucumber
  • 1/2 Cup of Olive Oil
  • 1/3 Cup of Red Wine Vinegar
  • 1 Tablespoon of Chopped Garlic
  • 2 Teaspoons of Worcestershire Sauce
  • Salt and Pepper To Taste

Preparing Your Vegetables

475852043

Wedge Tomatoes

Preparing the tomatoes is easy, even if your knife skills are a bit lacking. Create tomato wedges by simply cutting the top of the tomato with the stem off, then splitting the tomato down the middle, lengthwise. Next, lay the tomato halves flat with the cut side down. Cut each half in-half again lengthwise. Now take each quarter and split in half again — leaving 8 perfect tomato wedges.

56569387

Sliced Cucumbers

Now, slice your cucumbers by removing both tip ends. Then, simply slice the cucumber into thin, round medallions. Try to get the slices as thin as possible, otherwise the cucumber flavor tends to be a bit too strong in each bite and can actually overpower the tomatoes, onions and vinaigrette. For perfectly thin medallions every time, feel free to use a mandolin slicer.

485355854

Sliced Red Onions

When it comes to slicing your red onions, you have two choices. you can slice the onions into rings, or you can slice into strands. For rounds, simply cut the top and bottoms off of the red onion and slice width-wise into thing rounds or rings. For strands, cut the top and bottom off the red onion, then cut in half lengthwise then slice into thin strands — leaving half-rings. The reason for the options is that some people do not like the rings, and feel that that is just too much onion in every bite. Red onions are stronger and have more bite than yellow onions, so cutting in half and then into strands will make the onion flavor a bit milder in every bite. Again, feel free to use your mandolin for the onions as well.

166220132

Combine Vegetables

In a large mixing bowl, combine all of your vegetables together and add salt and pepper to taste. We tend to go a little heavy on the pepper, sprinkling all over the top of the vegetables, and just a hefty pinch of salt. You can use any type of salt you like, but we prefer kosher salt as the best. Once seasoned, give the vegetables a toss and stir, ensuring that all the veggies come into contact with the spices.

78460316

Prepare Your Vinaigrette

We use a “quick vinaigrette” for this marinade; this is a bit different than a emulsified vinaigrette, but gives a much better quality salad. As opposed to a traditional vinaigrette, you combine all the ingredients at once, instead of slowly drizzling in the oil. The reason we do this is that an emulsified vinaigrette will thicken too much and turn into a fatty thick dressing during the marinating. With the quick vinaigrette, the mixture remains thinner and better coats and marinates the vegetables.

To make the quick vinaigrette, combine Olive Oil, Red Wine Vinegar, Chopped Garlic, and Worcestershire Sauce in a separate small bowl. Once combined, use a wire whisk or a fork to whip the mixture together (for about a minute). Vinaigrette should come together and thicken a bit, but remain a fairly loose mixture. And that’s it!

HINT: Use a quick vinaigrette on other veggies, chicken, shrimp, fish and beef as a marinade as well

Your Gazpacho salad is almost done. Now just drizzle the vinaigrette over all of the vegetables in the large mixing bowl and use a spatula to toss everything together — ensuring that all of the vegetables get a taste of the vinaigrette.

Let Your Salad Marinate

Like we said in the introduction, giving the salad time to marinate, soak up the vinaigrette, and let the flavors meld is the real key to this recipe. We use the 8 hour rule to get the perfect flavor and let the vegetables break down a tiny bit. It can be served immediately — as we often did in the restaurant — but at least 4 hours is needed for the vegetables to really soak up some flavor.

500164113

Your Gazpacho salad is ready to enjoy! We don’t usually garnish our salad, but feel free to garnish yours with chopped cilantro or a chopped mint leaves. For extra flavor, we often dress each individual salad serving with blue cheese crumbles and serve alongside fresh baked bread (focaccia goes well with this salad).

Now Enjoy!

Don’t forget to follow us and get all of our delicious recipes as soon as they are published…

Fresh Chunky Salsa Recipe: Pico De Gallo Style

462398139

Everyone has their own personal preference as to which type of salsa they like best — chunky, smooth, watery, spicy, mild… When it comes to a tomato-based salsa, we prefer a chunky style salsa with medium heat; sort of similar to the “medium” heat salsas you will get served in a less-than-authentic chain Mexican food restaurant. Don’t get us wrong, we love the smooth red and green salsas that are more authentic, but salsa in the pico de gallo style is simply a personal favorite, and is very easy to make. You can make a big batch of this salsa and keep it in the refrigerator for a moderately healthy snack.

Pico De Gallo Style Salsa

Again, this style of salsa mimics pico de gallo, also called salsa fresca. Pico de gallo is technically more of a fresh salad rather than a sauce. With big chunks of fresh vegetables and a bit of tang from the lime juice, this salsa recipe could almost constitute a side dish.

Salsa Ingredients

There are very few ingredients to this recipe, but it is very important to make sure that your vegetables are very fresh. It is important to note that if you do not like the taste of cilantro — and there are many that do not — you can always substitute fresh parsley or leave it out completely. Also, we use Serrano chilies to get the medium heat, but if you want your salsa spicier, you can use 1 jalapeno instead. (NOTE: We are in Arizona, where jalapenos are bred to be much spicier than in other parts of the US. Outside of Mexico and Arizona, jalapenos will usually be milder than serranos by a bit). Thank you to several readers for feedback on this fact.)

  • 1/2 Cup of Fresh Cilantro (Sub Parsley)
  • 1 Large White or Yellow Onion
  • 2 Large Tomatoes or 3-4 Roma Tomatoes
  • 2 Serrano Chilies or 1 Jalapeno Pepper
  • 1-2 Fresh Limes
  • 1 Teaspoon of Rice Wine Vinegar

Directions For Making Salsa

  • As we said before, this recipe is incredibly easy and takes almost no time at all. The first thing you have to do is dice your tomatoes and onions into the perfect size; pieces should be a bit smaller than the size of a dime.
  • Next, we cut the Seranno or jalapeno chilies — depending on your preference. Split the chili down the middle and scrape the seeds out to discard. Next, mince the chilies as small as you can make them so that the heat from the peppers covers over all of the other vegetables.
  • Now, chop your fresh cilantro or parsley roughly and add to the rest of the vegetables. Give everything a stir.
  • The next step is to add your lime juice. Simply cut the limes in half and squeeze as much juice out of the limes as you can get. There should be a very minimal amount of lime juice, but if you have some dry limes, feel free to add an extra half of a lime squeeze.
  • The final step is to add a splash of rice wine vinegar into the mix. We find that it helps the lime juice to work its magic on the fresh ingredients and adds even more depth to the flavoring of the salsa.

That’s It!

Your Salsa is complete and can be eaten right away; however, the longer that the lime and vinegar has a chance to soak up, the more blended the flavor of the salsa will be.

491140637

What Chips Go Best With Salsa?

Now that our salsa is prepared, we can talk about the best chips to eat with salsa. Like we said previously, this recipe is meant to mimic the very non-traditional Mexican restaurant chain style salsas, so we like to go with the non-traditional restaurant style chips with this recipe. Below are some of our favorite restaurant style tortilla chips:

(Click Images to Order)

On The Border Restaurant Style Chips

Parade Restaurant Style Chips


Easy Tzatziki Yogurt Gyro Sauce Recipe

477214074

What Is Tzatziki Sauce?

Tzatziki sauce is a sauce and dressing that is of Mediterranean origin. Most often, you will find this sauce on gyros, Greek, Turkish, and middle-eastern dishes. Healthy, fresh and cooling, this sauce can be used on a variety of dishes, or as a side and condiment.  Versatile and delicious, tzatziki is easy to prepare, only requires a few ingredients, and will give extra flavor to any dish it is served with.

How to Make Tzatziki Sauce

There are very few ingredients involved with preparing tzatziki sauce, and the preparation of the sauce takes very little time. Like many other sauces, tzatziki just needs a little time to let the flavors blend and meld, but this preparation can be eaten right after making it.

Ingredients For Making Tzatziki Sauce

  • 1 32 Oz Container of Plain Yogurt
  • 2 Large Cucumbers
  • 1/2 Medium White Onion
  • 2 Heaping Tablespoons of Chopped Garlic (In Water)
  • 1/4 Cup of Fresh Lemon Juice
  • 2 Teaspoons of Dried Dill
  • Kosher or Sea Salt (To Taste)

Wallaby Organic Yogurt

Plain Yogurt

The yogurt is where all of the substance of this sauce comes from. Unlike many other mayonnaise-based dressings — such as Ranch, Blue Cheese, and Aioli — tzatziki is completely yogurt-based, and therefore is healthy, while staying rich, creamy and flavorful. You can really use any brand of yogurt, as long as it is “plain,” and not flavored with anything else. The whole point of tzatziki sauce is that we are going to flavor the plain yogurt to have a garlic bite, and a bit of sour lemon flavor. For this recipe, you will want to make sure that it is a 32 ounce container, to get the balance of ingredients correct. We used Wallaby Organic Greek Whole Milk Yogurt that is plain:

Preparing Your Tzatziki Sauce

482292695

Grate Your Cucumber

When it comes to adding the cucumber to the yogurt, we want grate the cucumber so that there are not large chunks of cucumber in the sauce, rather the flavored liquid and grated pulp are added. This is very simple to do… Simply peel the skin off of the cucumber — you can do this using a potato peeler. Once the cucumber is peeled, we want to slice it in half lengthwise. After splitting the cucumber, you will see that the center is filled with seeds. We want to remove those seeds by simply scraping them out with a teaspoon — leaving only the clean meat of the cucumber and no seeds.

Using a cheese grater, run the cucumbers through the smallest holes of the grater into a large bowl that you will mix everything together. Remember, it should be a watery and pulpy consistency.

513920379

Grate Your Onion

The grated onion is not usually added in traditional tzatziki recipes, rather the onion is grated dressed onto the meats such as gyros, kefta, or shawarma; however, we think that it really rounds out the cucumber flavor, so we add a half of a grated onion directly into the tzatziki sauce. You can leave the onion out, if you like; you will just have to adjust the measurements of the garlic, cucumber and lemon to your taste.

To grate the onion, simply cut a yellow or white onion in half and grate through the smallest holes of the cheese grater just like the cucumber; and just like the cucumber, it should look like water onion pulp.

Chopped Garlic

Add Your Garlic

With the onion and cucumber pulp and water in your mixing bowl, add 2 heaping tablespoons of garlic to the bowl. You can add more if you are a devotee of garlic, or add less if garlic is too strong for you — there is no perfect amount, it just depends on how your tastes are and how you like it. Get The Chopped Garlic We Used Below:

510180395

Add Your Lemon Juice

Now it is time to add the lemon juice to the mix. Like all the other ingredients in this recipe — besides the yogurt base — the amount of lemon juice you add depends on your taste, and your preferences. The lemon juice not only adds a hint of sour to the sauce, but also thins out the consistency of the yogurt and expands the flavor range. We find that for a 32 ounce container of yogurt 1/4 cup of lemon juice works nicely, but add as little or as much as your taste buds prefer.

474146047

Season Your Tzatiki

At this point, your tzatziki sauce is pretty much finished; all you need to do is mix everything together and give it a taste. If it needs some salt, add kosher or sea salt to taste. Note that the strength of the garlic and the onion will dictate how much salt you will need to add, if any.

Adding dill to the yogurt sauce will bring even more dimension to the flavors, so we usually sprinkle a bit of dried dill into the mixture along with the salt. If you don’t like dill, or want to leave well-enough alone, you can leave it out.

486024335

You Are Done!

This recipe is as simple as that. This sauce is most often served on gyro pita sandwiches, but can be eaten as a dip with fresh bread or pita, can be used as a dressing on salads and fresh vegetables, eaten alongside beef or lamb, and can even be used as a light marinade for chicken and seafood. After everything is mixed together, you can actually just pour the sauce directly into the empty yogurt container and write the date it was mixed on the lid. Sauce usually be good for 1-2 weeks, and just gets better after a few days.

Enjoy!

478742853

Easy Chuck Roast and Vegetables Recipe

462163845

There’s nothing as warm and inviting than a Sunday beef roast with roasted vegetables and fresh baked bread. Today, we will be giving you a great recipe for a juicy and flavorful beef roast from a very inexpensive — yet quality — cut of beef: chuck roast. Chuck roast is a bit smaller than round roasts or other larger cuts for roasting, so it makes a great roast size for singles and bachelors. This recipe is incredibly easy, requires little preparation, and when cooked slowly, you will have your roasted vegetables, potatoes, tender beef and a rich sauce on made in a single pot.

Ingredients For Chuck Roast With Vegetables

  • 1 3-5 Pound Chuck Roast
  • 3-5 Large Gold Potatoes
  • 2 Medium Onions
  • 3-4 Large Carrots
  • 3-4 Stalks of Celery
  • 2 Tablespoons of Chopped Garlic in Water
  • 1 Tablespoon of Onion Powder
  • 2-3 Sprigs of Thyme
  • 2 Teaspoons of Rosemary
  • 1 Teaspoon of Crushed Red Pepper Flakes
  • 1 1/2 Tablespoons of Worcestershire Sauce
  • 1 Dash of Soy Sauce
  • About 1-2 Tablespoons of Salt and Pepper for the Meat
  • 1 Large Bay Leaf
  • 1 Can of Beef Stock
  • Good Olive Oil

Again, this is a simple recipe to prepare; the trick is to get the vegetables cut to the right size. You want the vegetables to be cut a little larger than a dice… more of a cubed style cut.

501619165

Cut Your Onions

For the onions, simply cut off both ends of the onion. Next, Cut the onion in half lengthwise and remove the ouster skin. Next, Quart the onions and set to the side.

133483506

Slice Your Carrots

First peel the carrots and remove the ends. You will want to make sure that the carrot pieces are large by simply slicing on an angle to leave pieces approximately 1-1.5 inches long. Set carrots aside.

476756760

Slice Your Celery

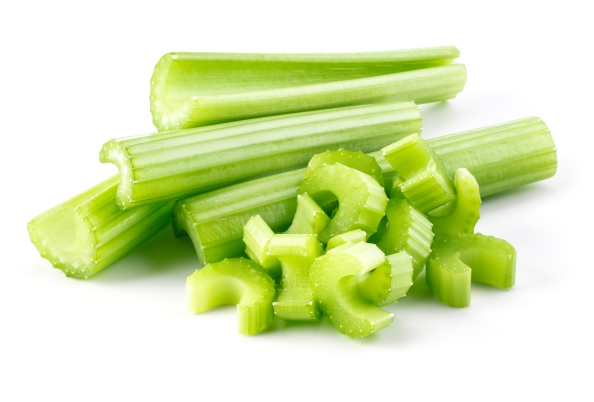
Just like we wanted to get large slices of carrots, we also want large slices of celery as well. Make sure to rinse your celery stalks thoroughly, as they tend to collect dirt on the inside. Slice off both ends of the stalks and slice the celery into about 1-1.5 inch pieces and add to the carrots and onions.

180416688

Cube Your Gold Potatoes

First off, we use gold potatoes instead of russet potatoes, as they are more flavorful and can really hold up to the long cooking time of this recipe. Leave the skin on, but wash them well. we use a light sink sponge with an abrasive back to scrub the potatoes. After washing, slice the potatoes in half lengthwise and quarter each of the potatoes leaving cubed pieces that are fairly large. Set the potato pieces aside.

SaltPepperRoast

Salt and Pepper Your Roast

We usually don’t marinate our roasts, and season them only with salt and pepper. We like to use sea salt — salt specifically from the San Francisco Bay (you can usually find this in major grocery store chains) — and freshly ground black pepper. The exact amount needed with vary depending on the size of your roast. Start with the salt and rub it all over the meat, making sure to get the sides and any exposed crevices in the meat. Next rub the fresh cracked black pepper all over the meat.

Soup Pot

In a large soup pot, drizzle good olive oil to lightly coat the bottom of the pot. We used Merula Olive Oil from Spain — Click Here to Get The Olive Oil We Used >>

Take your chuck roast and sear it on all sides over medium heat on the stove. Meat will not be cooked through, but will develop a tasty crust on all sides of the meat. After searing the meat, take the chuck roast out of the pot and set aside on a plate. Add another drizzle of olive oil into the pot and add all of your chopped celery, carrots and onions. Cook until translucent (about 5 minutes).

Once your carrots celery and onions have been cooked to translucency, we are going to add our Chopped Garlic in Water, Onion Powder, Sprigs of Thyme, Rosemary, Crushed Red Pepper Flakes, Soy Sauce, Worcestershire Sauce and Bay Leaf. Add a sprinkle of Salt and a bit of ground Black Pepper. Stir well to mix the spices and flavorings with the sauteed vegetables.

Next, lay out your potato cubes on top of the celery, carrots and onions — making a sort of a bed for the roast. Place the roast on top of the potatoes. Next, add your Beef Stock to the point where it is covering the vegetables and potatoes, but the chuck roast is not submerged. If the single can of beef stock is not enough, you can add water to get the liquid level to the perfect level.

Next place your lid on the soup pot and transfer to a preheated 375 degree oven. Continue to cook for 3-4 hours or until the roast is falling apart tender. During the cooking time, you will need to baste the roast with the liquid from the bottom of the pan about every 45 minutes to make sure that the top of the roast stays moist.

536168903

It is as simple as that!

When the roast is tender, simply remove the roast and plate it. It should be fork-tender and should easily fall apart into strands. Serve with the roasted vegetables and potatoes and maybe even a bit of blue cheese. This recipe goes great with Irish soda bread — Get Our Irish Soda Bread Recipe HERE >>