Tips For Cooking Salmon Perfectly

465877365

Salmon fillets and steaks are yummy, but it is not the easiest of things to cook salmon well. So, here are a few salmon cooking tips which would help you sidestep the usual errors and will save you the blushes when it is serve-up time!

Salmon Cooking Tips

Poach, Grill, or Pan Sear?

You can employ any of these methods, but you will need to go the right way. When poaching, many commit the common mistake of poaching the fish in plain water, though when poaching, you are missing on a great opportunity to add flavors. We say if you should poach, poach the salmon in milk, chicken stock, or fish broth and try flavors with lemon, peppercorns, bay leaves, etc.—whatever suits your fancy. It is also a great idea to poach the fish in dry white wine.

If you are grilling or hot-smoking, use only pre-soaked wood chips—try alder, hickory or maple. Lower the heat once it starts to smoke and keep the temperature inside the smoker at no higher than 80-90C.

In case of pan-frying, use a heavy non-stick frying pan and use olive oil or butter (heated in medium high-heat) to cook your salmon.

Choose the Right Salmon

If you are going for steak or fillet, make sure that you pick pieces all of uniform size and thickness. A center cut is normally your best option. Also, do not go for whatever is there in offer. Organically raised salmon tastes the best. They are normally more expensive, but you will also get the best of your salmon if you choose those varieties.

Do Not Rip the Skin Off

This is another common mistake you can make when cooking salmon. There are some recipes which may advise you to get rid of the skin, but we at Italian Home Kitchen Blog say that it is best that you do not, especially when you are pan-searing or grilling. The skin provides a nice safety layer between the soft salmon flesh and the surface of the grill or the hot pan. Cook the skin-side down and ALWAYS cook in lower heat.

Follow these tips and chances are slim that you will ever go wrong in cooking your salmon again.


Easiest Soft Boiled Egg Recipe That Works Every Time

472147894

We love soft boiled eggs; they are truly a quick and easy breakfast item that is healthy, affordable, and savory. Many cooks out there avoid soft boiled eggs, however, thinking that getting a perfect soft boiled egg is a hard task. In actuality, cooking the perfect soft boiled egg is not a hard task at all, you just have to follow the one and only recipe instructions 100% exactly. This method for soft boiled eggs was originally created by America’s Test Kitchen, which had to test over 1,000 eggs before they got the perfect method. This method is incredibly simple; just follow the instructions, and you will end up with perfectly set egg whites and a warm and creamy yolk.

Water For Soft Boiled Eggs

The secret to perfect soft boiled eggs has to do with the amount of water used, and time. we want to use very little water, and actually steam the eggs, rather than boil them. This means that the eggs will not be fully covered with water, rather the water at the bottom of the pot should be shallow and just enough to create a steam environment for the eggs to soft cook. You can use any size or shaped pot, as long as hit has a lid that will fit tightly, and 1/2 inch of water at the bottom.

Eggs Water Level

STEP 1

Bring your 1/2 inch of water to a full boil (with the lid on) until a steam chamber is created.

STEP 2

Take your eggs out of the refrigerator and add to the pot of boiled water/steam (Note: eggs should be well chilled in the refrigerator just prior to adding to the pot, for the soft boil to turn out perfectly).

Step 3

Cover with the lid and start your egg timer or stopwatch function on your smartphone and set to 6 and a half minutes exactly.

Step 4

After exactly six and a half minutes, remove the eggs from the pot and quickly rinse the eggs in cold water from the tap for about 15 seconds each.

Step 5

Crack the eggs with the back of a knife or with an egg topper to reveal perfectly cooked soft boiled eggs.

Enjoy!

It is just that simple. as long as your pot had steam and the eggs cooked for exactly 6.5 minutes, you will have perfectly cooked soft boiled eggs every time. This method will work with any number of eggs as long as the bottom of the pot can fit the eggs in a 1/2 inch of water. Once you try this method a few times, you will become confident that the eggs will turn out every time, and you will surely be serving more soft boiled eggs in your home.

468458136

Want to Get Perfectly Cracked Soft Boiled Eggs Every Time?
Get Our Favorite Egg Topper That Cracks Eggs Perfectly and Makes Attractive Plating:


Easy Gazpacho Salad Recipe

178156040

Delicious marinated vegetables are the star in our easy gazpacho salad recipe; comprised of fresh cucumbers, tomatoes and red onions. This is just about the easiest recipe in our collection and can be made quickly. Just like our Cannellini Relish recipe, the trick to this recipe is just to let the vegetables marinated for 8-12 hours to let the vegetables soak up all that delicious vinaigrette. This recipe is so quick and simple that we used to make it in a fix at the restaurant, or substitute this salad for others if we ran out of ingredients.

How to Make Gazpacho Salad

Ingredients:

  • 3 Medium Roma Tomatoes
  • 1 Medium to Large Red Onion
  • 1 Cucumber
  • 1/2 Cup of Olive Oil
  • 1/3 Cup of Red Wine Vinegar
  • 1 Tablespoon of Chopped Garlic
  • 2 Teaspoons of Worcestershire Sauce
  • Salt and Pepper To Taste

Preparing Your Vegetables

475852043

Wedge Tomatoes

Preparing the tomatoes is easy, even if your knife skills are a bit lacking. Create tomato wedges by simply cutting the top of the tomato with the stem off, then splitting the tomato down the middle, lengthwise. Next, lay the tomato halves flat with the cut side down. Cut each half in-half again lengthwise. Now take each quarter and split in half again — leaving 8 perfect tomato wedges.

56569387

Sliced Cucumbers

Now, slice your cucumbers by removing both tip ends. Then, simply slice the cucumber into thin, round medallions. Try to get the slices as thin as possible, otherwise the cucumber flavor tends to be a bit too strong in each bite and can actually overpower the tomatoes, onions and vinaigrette. For perfectly thin medallions every time, feel free to use a mandolin slicer.

485355854

Sliced Red Onions

When it comes to slicing your red onions, you have two choices. you can slice the onions into rings, or you can slice into strands. For rounds, simply cut the top and bottoms off of the red onion and slice width-wise into thing rounds or rings. For strands, cut the top and bottom off the red onion, then cut in half lengthwise then slice into thin strands — leaving half-rings. The reason for the options is that some people do not like the rings, and feel that that is just too much onion in every bite. Red onions are stronger and have more bite than yellow onions, so cutting in half and then into strands will make the onion flavor a bit milder in every bite. Again, feel free to use your mandolin for the onions as well.

166220132

Combine Vegetables

In a large mixing bowl, combine all of your vegetables together and add salt and pepper to taste. We tend to go a little heavy on the pepper, sprinkling all over the top of the vegetables, and just a hefty pinch of salt. You can use any type of salt you like, but we prefer kosher salt as the best. Once seasoned, give the vegetables a toss and stir, ensuring that all the veggies come into contact with the spices.

78460316

Prepare Your Vinaigrette

We use a “quick vinaigrette” for this marinade; this is a bit different than a emulsified vinaigrette, but gives a much better quality salad. As opposed to a traditional vinaigrette, you combine all the ingredients at once, instead of slowly drizzling in the oil. The reason we do this is that an emulsified vinaigrette will thicken too much and turn into a fatty thick dressing during the marinating. With the quick vinaigrette, the mixture remains thinner and better coats and marinates the vegetables.

To make the quick vinaigrette, combine Olive Oil, Red Wine Vinegar, Chopped Garlic, and Worcestershire Sauce in a separate small bowl. Once combined, use a wire whisk or a fork to whip the mixture together (for about a minute). Vinaigrette should come together and thicken a bit, but remain a fairly loose mixture. And that’s it!

HINT: Use a quick vinaigrette on other veggies, chicken, shrimp, fish and beef as a marinade as well

Your Gazpacho salad is almost done. Now just drizzle the vinaigrette over all of the vegetables in the large mixing bowl and use a spatula to toss everything together — ensuring that all of the vegetables get a taste of the vinaigrette.

Let Your Salad Marinate

Like we said in the introduction, giving the salad time to marinate, soak up the vinaigrette, and let the flavors meld is the real key to this recipe. We use the 8 hour rule to get the perfect flavor and let the vegetables break down a tiny bit. It can be served immediately — as we often did in the restaurant — but at least 4 hours is needed for the vegetables to really soak up some flavor.

500164113

Your Gazpacho salad is ready to enjoy! We don’t usually garnish our salad, but feel free to garnish yours with chopped cilantro or a chopped mint leaves. For extra flavor, we often dress each individual salad serving with blue cheese crumbles and serve alongside fresh baked bread (focaccia goes well with this salad).

Now Enjoy!

Don’t forget to follow us and get all of our delicious recipes as soon as they are published…

Fresh Chunky Salsa Recipe: Pico De Gallo Style

462398139

Everyone has their own personal preference as to which type of salsa they like best — chunky, smooth, watery, spicy, mild… When it comes to a tomato-based salsa, we prefer a chunky style salsa with medium heat; sort of similar to the “medium” heat salsas you will get served in a less-than-authentic chain Mexican food restaurant. Don’t get us wrong, we love the smooth red and green salsas that are more authentic, but salsa in the pico de gallo style is simply a personal favorite, and is very easy to make. You can make a big batch of this salsa and keep it in the refrigerator for a moderately healthy snack.

Pico De Gallo Style Salsa

Again, this style of salsa mimics pico de gallo, also called salsa fresca. Pico de gallo is technically more of a fresh salad rather than a sauce. With big chunks of fresh vegetables and a bit of tang from the lime juice, this salsa recipe could almost constitute a side dish.

Salsa Ingredients

There are very few ingredients to this recipe, but it is very important to make sure that your vegetables are very fresh. It is important to note that if you do not like the taste of cilantro — and there are many that do not — you can always substitute fresh parsley or leave it out completely. Also, we use Serrano chilies to get the medium heat, but if you want your salsa spicier, you can use 1 jalapeno instead. (NOTE: We are in Arizona, where jalapenos are bred to be much spicier than in other parts of the US. Outside of Mexico and Arizona, jalapenos will usually be milder than serranos by a bit). Thank you to several readers for feedback on this fact.)

  • 1/2 Cup of Fresh Cilantro (Sub Parsley)
  • 1 Large White or Yellow Onion
  • 2 Large Tomatoes or 3-4 Roma Tomatoes
  • 2 Serrano Chilies or 1 Jalapeno Pepper
  • 1-2 Fresh Limes
  • 1 Teaspoon of Rice Wine Vinegar

Directions For Making Salsa

  • As we said before, this recipe is incredibly easy and takes almost no time at all. The first thing you have to do is dice your tomatoes and onions into the perfect size; pieces should be a bit smaller than the size of a dime.
  • Next, we cut the Seranno or jalapeno chilies — depending on your preference. Split the chili down the middle and scrape the seeds out to discard. Next, mince the chilies as small as you can make them so that the heat from the peppers covers over all of the other vegetables.
  • Now, chop your fresh cilantro or parsley roughly and add to the rest of the vegetables. Give everything a stir.
  • The next step is to add your lime juice. Simply cut the limes in half and squeeze as much juice out of the limes as you can get. There should be a very minimal amount of lime juice, but if you have some dry limes, feel free to add an extra half of a lime squeeze.
  • The final step is to add a splash of rice wine vinegar into the mix. We find that it helps the lime juice to work its magic on the fresh ingredients and adds even more depth to the flavoring of the salsa.

That’s It!

Your Salsa is complete and can be eaten right away; however, the longer that the lime and vinegar has a chance to soak up, the more blended the flavor of the salsa will be.

491140637

What Chips Go Best With Salsa?

Now that our salsa is prepared, we can talk about the best chips to eat with salsa. Like we said previously, this recipe is meant to mimic the very non-traditional Mexican restaurant chain style salsas, so we like to go with the non-traditional restaurant style chips with this recipe. Below are some of our favorite restaurant style tortilla chips:

(Click Images to Order)

On The Border Restaurant Style Chips

Parade Restaurant Style Chips


Easy Homemade Irish Soda Bread

ThinkstockPhotos-187461107

Many people wish they could bake delicious homemade bread, but they think that the process is too cumbersome or that only professional bakers are able to produce a satisfactory loaf of bread. Fortunately, this is certainly not the case.

At Italian Home Kitchen, we’ve got the perfect recipe to get your started. A delicious loaf of Irish Soda Bread is not only easy to make, but it requires only the simplest of tools and ingredients. These are things almost everyone already has on hand.

This recipe leans more towards a traditional Irish Soda Bread, rather than the more Americanized and sweeter version that many people have become accustomed to eating. Real Irish Soda Bread is made with Irish wholemeal flour, similar to a coarse ground whole wheat flour that is used in many American kitchens.

To help lighten this bread and bring added flavor, we’ve added some delicious currants as well as bread flour, sugar, egg and butter. The list of ingredients is as follows:

2-1/2 c Irish wholemeal or 100% whole wheat flour
1-1/4 cups unbleached bread flour
3 Tbsp sugar
1 tsp baking soda
¾ tsp salt
2/3 cups raisins or currants
4 Tbsp cold butter, cut into 8 pieces
1-1/3 cups buttermilk
1 egg

To Make the Bread

ThinkstockPhotos-162055253

In a mixing bowl, combine the flours, sugar, baking soda, salt and the raisins or currants. Cut in the butter using a pastry fork or mixer, until mixture is coarse and there are no big chunks remaining.

In another bowl, whisk the buttermilk and egg together. Add to the dry ingredients and stir to combine. The dough should be stiff, but if it is too crumbly to come together, another 1 or 2 tablespoons of buttermilk can be stirred in.

Knead dough a few times just to make sure it holds together, then form it into a ball. Flatten slightly and place in an 8″ or 9″ round cake pan that is lightly greased. Cut a deep cross, about ½ inch deep across the top of the bread. Cut should extend all the way to the edges of the loaf.

Bake in a 400 degree F, preheated oven, for approximately 45 to 55 minutes. A cake tester should come out clean when inserted into the center of the bread and the bread should be golden brown. Remove from oven and immediately brush with melted butter, if desired.

Bread yields approximately 12 servings.

When you want to get the best recipes available on the web, be sure to follow us.

Recipe: Cannellini Bean Relish Salad

177028096

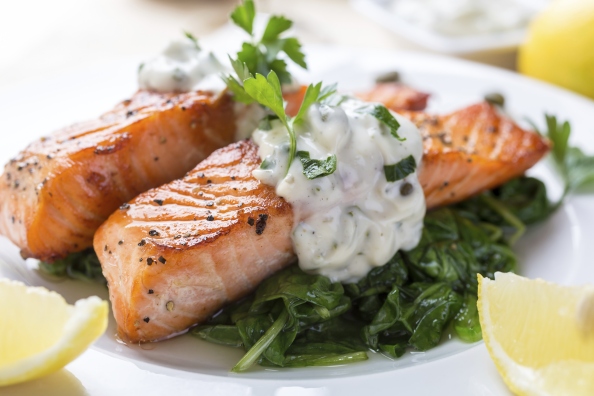
We should probably preface this article and recipe by explaining why this dish is technically a bean salad but referred to as cannellini relish. We mean relish in the old European form of the world, not the American form of relish that is usually that bright radioactive green pickle relish that get slathered onto hot dogs so often.

The best way to explain this relish is that it is much like the Spanish have salsa and use it to dress any number of food items. This relish is of Italian descent, and is used to dress meats, bread, or can even be eaten all by itself as its own salad. In our home, we make very large batches of this dish and it makes an appearance in almost every meal that we make — sometimes as a relish for other items, and other times just as a side salad. With that being said, lets get to this delicious and healthy recipe…

149477972

Cannellini Beans

First off, the cannellini beans are really the star of this dish, adding a protein that soaks up all the delicious dressing and marinates in it. We always use canned cannellini beans — as it is much easier this way — but feel free to cook the cannellini beans from a dry state if you’d like. Canned cannellini beans can be found in almost every grocery store, though sometimes they are just called white beans.

Ingredients:

  • 4 Large Stalks of Celery
  • 3-4 Large Carrots
  • 1 Bay Leaf
  • 3 Tablespoons of Chopped Garlic
  • 4 Large Roma Tomatoes
  • 2 Large Onions (Red or White)
  • 1 Serrano Pepper
  • 2 Cans of Cannellini Beans
  • Red Wine Vinegar
  • Good Olive Oil
  • 2 Teaspoons of Dijon Mustard
  • 1 Teaspoon Dried Dill
  • 1 Teaspoon Garlic Powder
  • 1 Teaspoon Onion Powder
  • Salt and Pepper to Taste

Recipe Directions

This is an extremely easy recipe to prepare, and most of the prep time comes from cutting the vegetables into their correct sizes to allow them to stay a bit crisp, but soak up all of the flavor from the vinaigrette dressing. Below you will find out to slice all of the vegetables perfectly for this recipe…

465147597

Slice the Carrots

First skin the carrots with your peeler and nip the ends off at each end. At a slight angle cut the carrot as thinly as you can, so that the pieces look like little coins. If your knife skills are lacking, you can always use a kitchen mandolin to get perfect slices every time.

488504459Slice the Celery

Firs separate the ribs of celery and rinse them under cold water — making sure to get all of the dirt and grit. Again, at an angle slice the celery very thinly. These thin slices of celery give a nice crisp snap that compliments the soft cannellini bites.

160557511Dice the Tomatoes

First Slice off the top of the tomato where the stem originally was and then cut the tomato in half lengthwise. Using your hand, rip out all or the seed and “guts” of the tomato so that you are left with to hollow halves of only the tomato meat inside of the skin (they should look like hollowed out boats). Next slice the halves into thin strips, rotate 90 degrees and slice thinly again to make little cubes of pure tomato meat.

177429740Slice the Onions

Whether you use red, yellow or even white onions is completely up to you. Some find red onions to be too strong, so we often tone it down with yellow onions — especially for the kids. First slice the top and bottom off of the onions, cut in half lengthwise and slice the onions into thin strips as shown in the picture above.

508729387

First off, make sure you get Seranno peppers and not jalapeno peppers. They look almost identical but the serranos are much milder than the jalapenos which are far to spice for this light and delicate dish. To put it in salsa terms, bell peppers are mild, serranos are medium, and jalapenos are fiery hot sauce. All you have to do is (very thinly) slice the pepper into little coins, seeds and all. The thinner you slice these the better, as if you bite down on a big chunk of serrano, you are going to get a lot of spice that overwhelms the mouth.

99720886

Prepare the Vinaigrette

We did not give exact measurements for the oil and the vinegar in the ingredients list for a reason; that reason is the amount of vinaigrette you need can fluctuate between batches, as some cannellini and vegetables soak up more vinaigrette and more quickly than other batches. The dressing, unfortunately, really needs to be “eye-balled” to get the best results. The magic ratio for vinaigrette is 1 to 3. One part vinegar to two parts oil. Using a blender or a stick blender, add the Dijon mustard, 1 tablespoon (out of the 3 total for this recipe) of chopped garlic, dill, garlic powder and onion powder and vinegar together. turn on the blender and slowly drizzle in the olive oil, allowing the mixture to froth itself into an emulsion. Remember the 1 to 3 ratio!

457934887

Combine All Ingredients Together

This recipe makes quite an amount of the relish, so when mixing everything together, we have found that using a large soup pot is best. First, open and drain the cans of cannellini beans and add it to the pot. Next add all of your chopped vegetables and the remaining garlic; after that, simply drizzle your vinaigrette over all of the ingredients and mix well — so that all of the ingredients are coated with the vinaigrette. The last thing you need to do is to tuck 1 whole bay leaf into the mixture and let it work its magic on the mixture.

Let It Marinate

Your Cannellini Relish Salad is now technically complete, however the longer the mixture marinates, the more flavor the vegetables soak up. When making this recipe, we usually allow the mixture to marinate in the soup pot — refrigerated — overnight. After giving it a good stir the next day, it is ready to eat. The longer you let these vegetables marinate, the better they get.

176874930

Well there you have it; the recipe is complete. Like we said in the beginning, this is often used as a relish that adds flavor to anything from meats to rice to bread and beyond. We, ourselves, have used this on everything from wraps to topped on sirloin grilled steak… so don’t be afraid of mixing this relish into other dishes, and feel free to explore how it compliments other dishes, proteins and recipes.

Enjoy, and check back often for our latest and most delicious recipes.